Friday, March 29, 2013

Hello Kitty Favor box

Hello Kitty . . .

Isn't she just the cutest?  It may be hard to tell from this photo but you are looking at a little basket. 

I took this photo at our last demo meeting.  This was a project shared by one of my team members, Sue Adams.

How would you use this little basket? We all ooh'd and aah'ed and then started thinking how we'd use it.  Maybe as a gift to a co-worker? or for kid's birthday party favors.  There were lots of ideas.

The Hello Kitty Basket was very simple to make.  The box itself is the Fancy Favor Die.  This is the same one I used to make the Snowman boxes posted in Jan.
*The eyes and the nose were punched with circles and our small oval punch.
*The eyelashes were drawn by hand. 
  The white on the eye is with Stampin'UP!'s White Gel Pen. 
*The bow Sue said she made with the Blossom Petals punch.
*The whiskers were cut by hand.
*And the ears (I'm so impressed) are a heart punch.  Brilliant.

See . . . this is one more reason to buy the Starter Kit. You have access to our meetings and our Show and Tell sessions.  I take pictures of everything (like this box) and post them on a private website for those who are not local or who can't attend a meeting.

The Starter Kit is an amazing deal - you pay $99 and get to choose $125 $150 worth of product.  You pay sales tax but the shipping is FREE on the Starter Kit.  What a way to start out in this hobby or to build up your supplies.  And you can order the Kit on-line and it gets shipped right to your house.  You'll have it in a week.  
Its 100% customizable.  
You choose what ever you want, $125 $150 or less, and pay only $99 (plus tax).
update: Stampin'UP! just announced an extension of the Sale-a-bration Starter Kit special
through the end of March
3 more days to get and extra $50 when you buy the Starter Kit.
Wow!  $99 + tax buys you $150 of YOUR CHOICE of product.

Many people buy this "Kit" because its such a great deal financially - you don't have to start a business. Others buy the kit because they do want to start a business. Either way you get support from me and others on our team. And if you do want to get a stamping business going I'm there to help. Our private group website has lots of helpful information and of course, the Stampin'UP! demonstrator website has tons of business help.  Buy your Starter Kit HERE and be sure to call (608) 220-3450 or email if you have any questions.

Buy your starter kit before April 8th and get a Free List of 30 Ways to use Crystal Effects

Happy Stamping
--Katie

Thursday, March 28, 2013

Blossom Punch Art Candle Flame

Punch Art Card - Candle flames made with the Blossom Petals Builder Punch I love when I find a way to use a punch other than its intended use.  Today's card uses several punches, some as intended and others in a more creative way. 

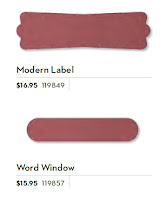
At the bottom of the card is a light green piece that was punched with the Modern Label punch.  This punch was intended for punching out words.  I left it blank on this card because I hadn't yet decided what to use this card for.

The label is sitting on top some darker green leaves.  These were punched with the Bird Builder Punch.  Again this was the intended use for this punch.

But look at those candle flames.  Now those were made with the Blossom Petals Builder Punch. Definitely a creative use for this punch.

Here are a few other things you can do with the Blossom Builder Punch
Punch Art Dog Card Made with Stampin'UP!'s Blossom Builder PunchPunch Art Easter Bunny and Cabbage Card Made with Stampin'UP!'s Blossom Builder PunchPunch Art Candle Flame Card Made with Stampin'UP!'s Blossom Builder PunchPunch Art Cards Made with Stampin'UP!'s Blossom Builder Punch


And lastly, the curve at the top of the candle was made with the Extra Wide Oval Punch.

Shape of Stampin'UP!'s Blossom Petals Builder Punch Shape of Stampin'UP!'s Bird Builder Punch Shape of Stampin'UP!'s Modern Label Punch and Word Window Punch

Are a fan of punch art?  Be sure to check out all the great punches in the Stampin'UP! catalogPages 182-185.

And don't you just love that you can browse on-line, shop on-line and have your order shipped right to your door?!
*view the Big Annual Catalog here    Flash Version  - or -  PDF
*see the Spring Mini-catalog here    Flash Version  - or -  PDF
Contact me if you'd like paper copies of the catalogs mailed to your home (608) 220-3450

By the way, you also earn Customer Rewards with me.  I appreciate your business and reward you for it.  Check out my customer rewards program here.

And all on-line orders between now and April 8th will receive my FREE list of 30 Ways to use Crystal Effects.  Just use this Hostess Code to get your Free list.  U2E6U9KP

Happy Stamping
--Katie

Wednesday, March 27, 2013

Crystal Effects - Dimensional Glaze

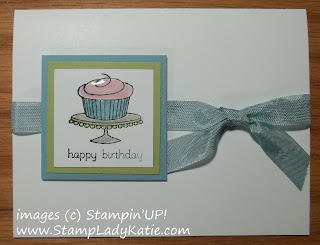
Card made with Stampin'UP! Stamp Set: Easy Events and Crystal Effects.Crystal Effects is a dimensional glaze.  It gives a wonderful glossy, 3D look to a project. Just look how puffy and shiny the frosting is on this image.

Crystal Effects comes as a liquid in a bottle with a long narrow applicator tip.  Basically you "paint" it on your project.  Its an easy way to get an embossed look without the heat gun.  Or get the embossed look for just part of the image.

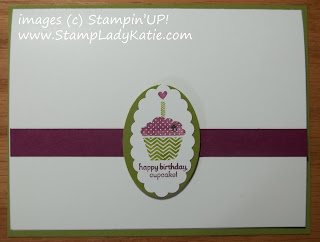
Card made with Stampin'UP! Stamp Set: Easy Events and Crystal EffectsThis image is the cupcake from a stamp set called Easy Events.  By the way, this is my "go to" set when I need a quick card.  There are 8 different images to choose from, each with a sentiment.  You can see all 8 images in this post.

You can add color to these images 2 ways: One way is by stamping in black and coloring the image with markers.  Or, use markers directly on the stamp. In fact, if you use markers on the stamp you can omit parts.  For example you can ink just the image and not use the words. So this set of 8 becomes a really versatile set in your stamping "arsenal".  

OK, back to the Crystal Effects.  Here is the card with and without the Crystal Effects. Click on the image to make it larger.

Card made with Stampin'UP! Stamp Set: Easy Events and Crystal Effects Card made with Stampin'UP! Stamp Set: Easy Events and Crystal Effects

 
30 different ways to use Crystal Effects Are you local (Stoughton/Madison Wisconsin area)? If so, sign up for the April Stamp-a-Stack. Sunday April 7th or Monday April 8th. All our projects will be using Crystal Effects. This stuff is amazing - its way more than just a dimensional glaze.  Just wait til you see what else we use it for.  I did a little research and came up with 30 different ways to use it. Everyone who attends this event will get to take home a bottle of Crystal Effects and will get my list of 30 Different Ways to Use Crystal Effects


Not local?  Unable to attend?  You can still get the list. Everyone who places an on-line order before the event will get the FREE list of 30 Different Ways to Use Crystal Effects, along with sample photos.  Order on-line here and be sure to enter this Hostess Code in the box.
U2E6U9KP  
You'll receive your FREE list and photos by email the next day. And remember, orders over $25 qualify for Customer Rewards Points.

Happy Stamping
--Katie

Tuesday, March 26, 2013

Fabric Frenzy

Are you a fabric crafter?  
If so you'll definitely want to check out 
Stampin'UP!'s line of Designer Fabrics.

And now - for 1 week only - all fabric is 50% off!

Here are Emily and Katie from Stampin'UP!'s home office 
showing some of the cute ways to use our fabric.

  • No minimum purchase required to receive the discount
  • All items are limited quantity at the discounted price; the discount will be removed once the limit is reached
  • These are EXTRA WIDE fat quarters (27" x 18") which normally sell for $9.98 and are reduced to only $4.98 for this sale.
  • Also on sale is the Essentials Designer Fabric Bundle
    (normally $29.95 now reduced to only $14.98)
Stampin'UP!'s fabric patterns on sale.

Shop On-Line HERE

All on-line orders between now and March 31st will get a FREE copy of my list of 
30 Different Ways to use Crystal Effects


Just enter this Hostess Code when you place your order. U2E6U9KP
And if your order is over $25 you'll also earn Customer Rewards Points.  Read  about my exclusive Rewards Program Here.

Page
Item
Description
Discount
Retail Price
Sale Price
170
126892
Essentials Designer Fabric
50%
$      29.95
$    14.98
171
126893
Floral District Fabric
50%
$        9.95
$      4.98
171
126894
Comfort Café Fabric
50%
$        9.95
$      4.98
171
125411
Summer Smooches Fabric
50%
$        9.95
$      4.98
171
125412
Twitterpated Fabric
50%
$        9.95
$      4.98
171
122337
Timeless Portrait Fabric
50%
$        9.95
$      4.98
171
122336
Beau Chateau Fabric
50%
$        9.95
$      4.98
171
124066
Spice Cake Fabric
50%
$        9.95
$      4.98
171
122335
Flirtatious Fabric
50%
$        9.95
$      4.98
6*
129308
Tea for Two Fabric
50%
$        9.95
$      4.98
13*
129307
More Amore Fabric
50%
$        9.95
$      4.98

Thanks for Stopping by
Happy Stamping and Happy Sewing
--Katie

Monday, March 25, 2013

Bright Blossoms for Spring

Card made with Stampin'UP! Stamp set: Bright Blossoms
I certainly hope we'll be seeing some "Bright Blossoms" soon.  Here in southern Wisconsin we still have snow on the ground and no sign of crocus, hyacinth or tulips.  So for right now, this card is my Bright Spring Blossom.

You may not think of these as spring colors, but I chose red in honor of the University of Wisconsin's colors. Its the middle of "March Madness" and the basketball tournaments. Sadly Wisconsin lost in the first round, so now my husband is just rooting for all the Big Ten Teams. Anyway, that's why this card is red.

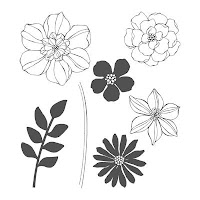
The flower images on this card are from a stamp set called Bright Blossoms. Its a fun little "builder set" - by that I mean that you can build different flower scenes with the images. The set has vases, leaves and flower heads and you can put the images together is lots of different ways.

A coordinated set like Bright Blossoms really has a lot of fun possibilities.

Stampin'UP! Stamp Set: Bright Blossoms
Keeping it coordinated.  The common element for all the images in the Bright Blossom Stamp set is the circle shape.  So I used 2 round background layers for this card to match the round shape of the images. 

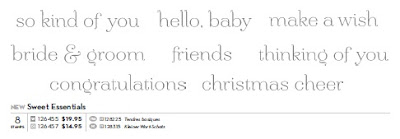
Stampin'UP! Stamp Set: Sweet EssentialsThere are no sentiments in the Bright Blossom stamp set.  So when looking for words I wanted one where the font had a similar "roundness" to the letters (instead of a fancy script).  The sentiment on this card is from a set called "Sweet Essentials".  

Sweet Essentials is a really versatile set too. It doesn't have the traditional "Happy Birthday" and "Happy Anniversary", but the "make a wish" and "congratulations" covers a lot of occasions. For someone just starting out in this hobby this is one stamp set I'd suggest.

Stampin'UP! has lots of great stamp sets and a full selection of stamping and scrapbooking tools. You'll love looking through the catalogs because there are tons of samples shown with the product.
*view the Big Annual Catalog here  . . . .  Flash Version  - or -  PDF
*see the Spring Mini-catalog here . . . . .  Flash Version  - or -  PDF
Contact me if you'd like paper copies of the catalogs mailed to your home (608) 220-3450


I appreciate your business and I reward my customers.  
See how you can earn Customer Loyalty points 
when you shop with me. 
Happy Stamping
--Katie 

Saturday, March 23, 2013

Use the Cupcake Punch to make Clouds

Easter Card made with Stampin'UP! stamp set: Everybunny and clouds made with the cupcake punch.
If you're like me, then once you invest in a punch you're always looking for new, creative ways to use it.  Well, here's a great idea for getting extra use from your cupcake punch. Use the frosting shape as a cloud.


This Easter card was actually pretty simple to make.  
  • The grassy hills are 2 different colors of green that were cut with a scissors and layered.  
  • The Bunny image (from a set called Everybunny) was colored with markers. 
  • And the clouds were punched with the cupcake punch
Stampin'UP!'s Cupcake punch used to make clouds for a project. 
The cupcake punch is one that kids especially love.  Not only does it punch the cupcake and the frosting, but there is a cherry, a candle and a flame and 3 small circles to use to decorate the frosting. Give this punch and some paper to your kids and sit back and watch the fun.


The cupcake punch is just one of several "builder" punches that we carry.  You can browse the catalogs here
*view the Big Annual Catalog
  Flash Version  - or -  PDF
*see the current Mini-catalog
  Flash Version  - or -  PDF

You can get all the cupcake punch and all your Stampin'UP! supplies from my on-line store.


And be sure to check out my Customer Rewards Program. Its satisfied customers who keep me in business.  So please feel free to call with any questions.  (608) 220-3450.

Happy Stamping
--Katie

Friday, March 22, 2013

Crocheted Embellishment

The crocheted embellishments on today's cards were a gift from a friend.  Carole crochets these tiny flowers and asked if I thought I could use them for a card.  Here's the end result.

The vase for this card was punched from the Decorative Label Punch with the bottom point cut off.  The leaves are from a set called Embellished Events, and actually there are stamped images of flowers under the crocheted flowers. 

Here's a close up.  On this card the crocheted flowers are held in place by brads.  The small flower worked well with the regular size brad.  The larger flower had an open circle in the middle so it needed a larger brad.  Stampin'UP!'s black glimmer brad looks great - it sparkles like morning dew.
Card decorated with Stampin'UP! Embellished Events and hand crocheted flowers


For the 2nd card the stamped swirl is from Everything Eleanor.  There are no stamped flowers here, just the stamped swirl.  The blue crocheted flowers are just randomly spaced on the card.  And the centers of these crocheted flowers were embellished with  Stampin'UP!'s self stick rhinestones.

Card decorated with Stampin'UP! Everything Eleanor and hand crocheted flowers


Card decorated with Stampin'UP! Embellished Events and hand crocheted flowers

Card decorated with Stampin'UP! Everything Eleanor and hand crocheted flowers

You might be asking why put anything in the center at all? The answer is, that the way these flowers were crocheted they ended up with an open circle in the center.  The rhinestones were my way of covering up my adhesive.

These flowers are so sweet and they look wonderful with the images from Embellished Events and Everything Eleanor.  I'm sure they'd look great on other projects too.  

And I'm lucky to have met such a talented crocheter - its certainly not one of my talents. Thanks Carole!
I first met Carole because she signed up to attend one of the classes I teach at the Monona Senior Center and I'm so glad she shared her crochet hobby with me.  It was fun finding a way to use them on a card. I have met so many wonderful, amazing people through the classes these classes.You'd have fun too, why not join us.

Attend an event - meet new people - have fun stamping!  Are you looking for a fun social event?   Sign up for a class . . .  I teach monthly classes at both the Monona Grove Community Center and the Oregon Community Center.  Our groups include brand new stampers as well as experienced people, and you don't have to actually live in Monona or Oregon in order to attend.  The common thread is that everyone is friendly and has fun stamping together. Check the class schedule HERE and sign-up online.

I hope to see you at an event soon
--Katie

 TODAY (March 22nd) IS THE LAST DAY 
of the Sale-a-bration sale.
Each $50 you spend earns you a FREE item from the Sale-a-bration brochure.
Today is the perfect time to inventory your supplies or to invest in new product.

Tuesday, March 19, 2013

My mistake when Masking and Stamping Off

Today's post is a tip for masking while Stamping Off.  And I'm going to show the tip along with my mistake so you'll know what to avoid.  

First - the definition of the word mask.  You put on a mask (like during Mardi Gras) to hide your face.  In stamping that's what a mask is used for, to hide something. 

The Stamping Off is how I got the different colors for the flowers.  Its just one ink pad - Rich Razzleberry. The concept of stamping off is that you stamp 2-3 times WITHOUT re-inking.

The Masking comes in here: For this card I wanted a clean sharp edge separating the flower side of the card from the area where the butterflies would go. I didn't want any flowers or leaves sticking out from under the right side of the ribbon. So I used a post-a-note as seen in the image below to create the edge.

Now, here's the mistake I made. Can you see the odd, straight dark areas on several of the flowers.  Thats because when I stamped that first dark image on the EDGE of the white paper, the pressure was different and it lost more ink on one side than the other. Which made for the odd line when I stamped again without re-inking.

So, how to avoid this?  when you want those lighter images, just "stamp off" the first dark image on a scrap piece of paper and then do your lighter image on the project.


Are you local to the Madison/Stoughton/Dane County area?  Do you like learning  tips and tricks for stamping?  Would you like to meet some other local stampers?
  •  Check out my events calendar and join us for a class.  Bring a friend with you.  Stamping is a fun social experience.
  • I also do private classes for you and your friends.  And it doesn't matter at all whether your friends are stampers or not.  You enjoy it, right?  That's why you're here.  Together we'll create an event where your non-stamper friends fall in love with the hobby just like you have. Contact me to arrange an event. 

Happy Stamping
--Katie
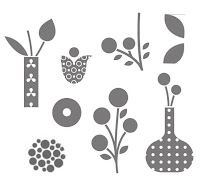
Oops I forgot to mention that the stamp set used on this project is called Bloomin Marvelous and its one of the exclusive Sale-a-bration sets for 2013.  And there's only 4 days left of Sale-a-Bration!!  
Sale-a-bration ENDS FRIDAY . . . . . . . . .  Don't miss out on this once-a-year Sale.


Monday, March 18, 2013

Dapper Dad's Vest

This vest would certainly make quite the dapper outfit! And if you're thinking that I chose an unusual adjective, that's because the stamp used for the tie is from a set called: Dapper Dad. In fact the tie and the sentiment are the only things stamped on this card. 

This card is so easy to make. The vest is just a piece of Designer Paper with armholes punched with an oval punch. Stampin'UP!'s Wide Oval Punch was just the perfect size.  The V-neck was cut with a scissors and the buttons were punched with a small circle punch.

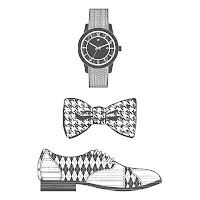
Dapper Dad is such a cute set for making masculine cards.  The set has 3 images: a watch, the bowtie and a shoe.  Don't you just love the "old-time" look of these images?
Stampin'UP! Stamp set: Dapper Dad
 
I've had so much fun playing with this stamp set. Here is another card made with the tie. This is a much more formal look than the vest above. 

And check out the tie on this card (posted a few weeks ago) with the formal cumberbund and suspenders. 


Man's Vest card made with Stampin'UP! Stamp set: Dapper Dad

Tuxedo card made with Stampin'UP! stamp set: Dapper Dad.
What's the Occasion? I put the word "celebrate" on this card. How would you use it? Birthday? Anniversary? Maybe you'd choose a different sentiment? Leave me a comment below with your ideas for this card.

Have you seen our most recent catalogs? Whether you are stamping for a formal occasion or a casual one, you'll find just what you need with Stampin'UP!  The catalogs are all available on-line here. Or contact me and I'll have a catalog sent to your house (608) 220-3450

Thanks for stopping by
Happy Stamping
--Katie
Have you placed a Sale-a-bration order yet?  
Friday is the last day of Sale-a-bration for 2013.  
Your last chance to get something free.  Check out the choices here.
Don't miss out on this once-a-year Sale.


Sunday, March 17, 2013

Markers on Brushed Metallic Paper

Card made with Stampin'UP! sets: Secret Garden and Feel Goods with markers colored on Brushed metallic paper.
Here's a different look:  use markers on Brushed Metallic Paper.  The fact that the paper already has some color makes the added color very subtle.

For this project the leaf and flower images were embossed in gold.  Then the pink color was added with a marker.  Its a very subtle and really pretty look.

The images used here are from a stamp set called Secret Garden.  And by the way this set has a matching set of framelit dies to cut the shapes after you've stamped.  You can see an example on this card and this scrapbook page.
Card made with Stampin'UP! sets: Secret Garden and Feel Goods with markers colored on Brushed metallic paper.

The sentiment is from a stamp set called Feel Goods.

Are you a fan of heat embossing? These images really "pop" off the paper because they are heat embossed in gold. It makes a very impressive image on the paper.
  • You need something sticky to hold the embossing powder to the paper - on this project the images were stamped in Versamark ink as the "sticky" agent
  • While the ink is still "sticky", sprinkle on the embossing powder
  • Heat until the powder melts into the paper. Voila!  

The stamp sets and all the products used here can be purchased on my Stampin'UP! Store.
Click HERE to shop

Stampin'UP! Secret Garden Stamp Set
Stamp Set:  Secret Garden
Stampin'UP! Feel Goods Stamp set.
Stamp Set:  Feel Goods
Brushed Metallic Paper
Brushed Gold Metallic Paper
Stampin'UP! Heat Tool
Heat Tool
Stampin'UP! Gold Embossing Powder
Gold Embossing Powder
Versamark Ink Pad
Versamark Ink

So there you have it: 2 "golden" tips for dressing up a project
1.  Heat embossing is really easy.
2.  Coloring on Gold paper adds a subtle but elegant look. 

Thanks for stopping by
Happy Stamping
--Katie

only 6 days left of Sale-a-Bration!!  Don't miss out on this Sale.


Saturday, March 16, 2013

Simple Lay-out with Added Texture

Card made with Stampin'UP!'s Sale-a-bration 2013 set: Patterned OccasionsThis is the final post about my paper scraps. Did you catch the first post?  Weird where our inspiration comes from, in this case it was from my scrap pile.
  • The first post showed 2 simple lay-outs for using the scraps
  • The second post showed how to use markers to vary the color on the stamps
  • This post shows how to jazz it up a little with added texture.
Card made with Stampin'UP!'s Sale-a-bration 2013 set: Patterned OccasionsThe top card has that scrap paper strip.  But for the 2nd card its jazzed up a little with some added texture.  

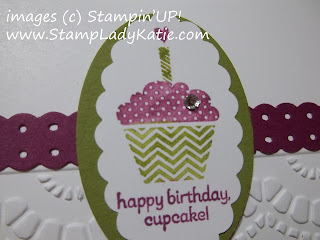
The strip was wide enough to fit in my Dotted Scallop Ribbon Border punch.  I love the sweet polka-dot effect you get with it and the tiny scallops along each edge.

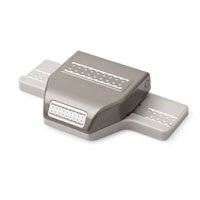
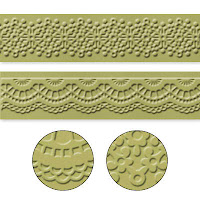
The extra texture on this card is from the Delicate Designs Embossing Folder.  This product is a set of 2 narrow folders to emboss card edges.  

And they coordinate with the Large Scallop Edgelits Die.

Stampin'UP! Dotted Scallop Ribbon Border Punch
Stampin'UP! Delicate Designs Embossing Folders
Stampin'UP! Large Scallop Edglit matches the Delicate Designs Embossing Folder
Adding a little texture to a simple lay-out can really add a "wow" factor to a project.


Have you seen the Dotted Scallop Ribbon Border punched used to make Framing Layers? 
**This video shows how to make a square Framing Layer
**This video shows how to make a Rectangular Framing Layer    

Thanks for stopping by
Happy Stamping
--Katie

only 7 days left of Sale-a-Bration!!  Don't miss out on this Sale.


Friday, March 15, 2013

Color Variations on a Stamp

Still playing with Patterned Occasions.  Yesterday's post played with a simple lay-out and shows 2 variations for the lay-out: vertical and horizontal.  (scroll down if you haven't seen yesterday's post).

Here's the Stamp set used for these projects. This is one your choices during Sale-a-bration this year.  You can see all the Sale-a-bration choices here.


Today I just want to explain the color variations.  You'll notice that each stamp is both the image and the sentiment.  But my projects are multi-colored.  This is just a reminder that you don't have to use an ink pad - you can ink the stamps with a marker too. 


Thanks for stopping by
Happy Stamping
--Katie