Saturday, August 17, 2024

Thanks for Looking

Hi and thanks for following what ever link brought you here. Clearly I am not using this blog regularly,

At this point in time I am posting most of my content on YouTube and on Pinterest and almost daily on Facebook.

I look forward to connecting with you in one of those places. 

Sunday, April 7, 2024

Spring Housecleaning - Literal and Digital

For many people spring is a time for a deep clean. Living on a farm in Wisconsin cleaning is a daily chore and especially so living with 2 dogs.

Spring is also a time of transition at Stampin'Up! We're in the last month of the catalog cycle. So for many demos this means cleaning the craft room too and organizing product accordingly.


There's been some digital clean-up too. The retiring product has all been noted on the shopping site and the Last Chance Sale starts on Tuesday.

The new catalog goes live next month and demos are busy pre-ordering and making samples. 
  • Customers will be able to browse and shop the new catalog in May.
    Contact me if you want a paper copy of the new catalog - its a great source of project ideas.

  • Also - be sure you follow my Facebook page to see those samples when they post.  As you can tell from the post dates this site does not see much activity but I do post to Facebook pretty regularly. So much goodness to share and not enough time to do it all. 


Have an INKcredible day


Friday, June 24, 2022

Glimmer Paper Diecut Brilliant Wings Butterfly Inlay

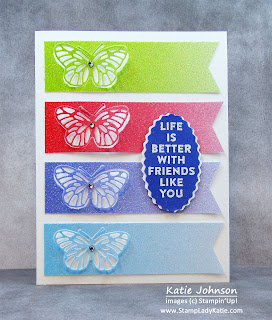
Today's project showcases a die cut technique called INLAY
The concept is simple: cut a shape and lay it back into its hole.

Glimmer paper butterfly Inlay card using Stampin'Up!'s Brilliant Wings Dies
 
Gorgeous paper, right?  Its glimmer paper! A.W.E.S.O.M.E.
I used Stampin'Up!'s new 2022-2024 In-Color Glimmer Paper
and did you notice the subtle ombre effect in the color ... so pretty
full product list below

Lets talk adhesives for a minute . . . for 2 reasons.
 
#1:  notice the fluttery effect on the butterfly wings?
the butterfly has adhesive under only the body so the wings are free to lift up
 
Glimmer paper butterfly Inlay card using Stampin'Up!'s Brilliant Wings Dies

#2: the surface of any glimmer paper presents a challenge
using something flexible like a Glue Dot or foam Dimensionals
helps keep parts like the sentiment piece attached to the surface of glimmer paper

The nice thing about videos is you can fast forward thru the parts you don't need to see.
BTW I post how-to videos each Monday on my FB page,


This card has such a happy, summery, carefree feel. I love the bright colors.
Do you have a butterfly punch or die?  Are you feeling inspired? 
There is a full product list at the end of this post

Thanks for stopping by . . . have an INKcredible day!


Follow my Facebook page
to keep up with my daily crafting


When placing an on-line order 
please make sure you have
Katie Johnson listed as your demonstrator
So I can send you a Thank-you Card
If you don't choose a demo, you'll be randomly assigned a demo
 
I do appreciate your business - Thank-you!
Click here to browse all the current product

 
 Here are links to the products used on today's card
. . . to help you be INKcredible!

Grid Paper
[130148]
$12.50

Saturday, April 2, 2022

Ink Splatter Background with Markers

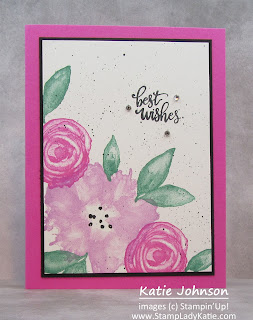
Have you ever created a beautifully stamped image, but felt it looked a little 'empty'? One solution is to fill in the space with ink splatters

Ink Splatter highlights on a card made with Stampin'Up!'s Artistically Inked stamp set

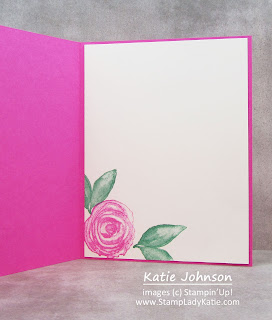
 Of course the flowers by themselves are so pretty you may not feel they need anything extra.  These images are from a set called Artistically Inked. They work great on the inside of the card as well

a card made with Stampin'Up!'s Artistically Inked stamp set

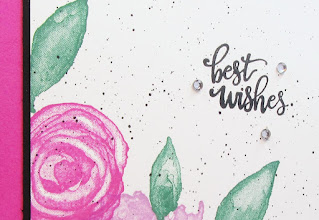
Ink splattering is an easy technique: think about a paint brush or toothbrush and the splattering caused by running your thumb across the bristles. You can achieve the same effect by 'flicking' the tip of a marker across the edge of the marker cap. 

You can control the pattern density by how close you hold the marker to the project. Just look at the beautiful effect.

Ink Splatter highlights on a card made with Stampin'Up!'s Artistically Inked stamp set
 

Worried about damaging the marker? You may wonder if using a marker to create these ink splatters might damage the  marker tip . . . the answer is yes, the tip will be affected. That's why I keep several black markers and keep one dedicated just for this technique. And it doesn't matter which kind; I've had success with both the classic (water based) markers as well as the blends (alcohol based markers).

Use a black marker to create ink splatters  Use a black marker to create ink splatters


If you haven't tried ink splattering yet I encourage you to give it a try. Its easy and it creates some awesome looking cards.   

Ink Splatter highlights on a card made with Stampin'Up!'s Artistically Inked stamp set

And if you like the look of these cards there is a full product list at the bottom of this post.  I appreciate your support. . . . for more ideas follow my Facebook Page to see my daily stamping.

Thanks for stopping by today. I hope I've inspired you to go play and make something INKcredible.


Follow my Facebook page
to keep up with my daily crafting


When placing an on-line order 
please make sure you have
Katie Johnson listed as your demonstrator
So I can send you a Thank-you Card
If you don't choose a demo, you'll be randomly assigned a demo
 
I do appreciate your business - Thank-you!
Click here to browse all the current product

 
 Here are links to the products used on today's cards
. . . to help you be INKcredible!
 
  ←
Either  kind of marker will work 

Wednesday, March 23, 2022

Layout Idea for a Large Flower Die: Forever Blossoms

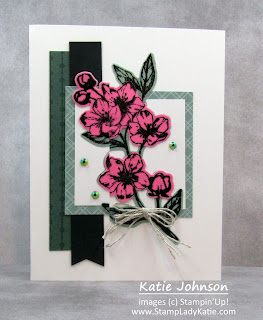
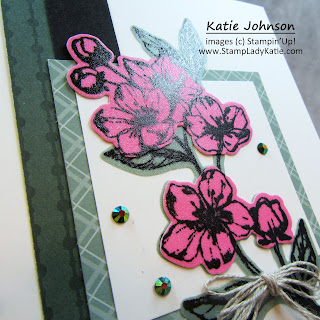
Do you have any large flower stamps and dies?  Here's a fun layout to try. I used Stampin'Up!'s Forever Blossoms stamp set and Cherry Blossom dies but this layout would work with any large flower die. 

Card made with Stampin'Up!'s Forever Blossom's Stamp set and coordinating Cherry Blossom Dies

It might be hard to see in the photo but the flower and leaves were stamped on Shimmer Vellum - which gives a subtle but eye-catching sparkle to the project. The flowers and leaves are a single die so there was a bit of fussy cutting to do the layering. Actually, this particular stamp - Forever Blossoms, would have been easy to fussy cut the whole thing. Having the coordinating Cherry Blossom dies is just a convenient bonus.

Card made with Stampin'Up!'s Forever Blossom's Stamp set and coordinating Cherry Blossom Dies

I love this layout for showcasing large flower stamp. You could use it for any large shape: think star or heart or cute animal. The layout also works well to show off different designer papers.  

layout for a large flower image featuring Card made with Stampin'Up!'s Forever Blossom's Stamp set and coordinating Cherry Blossom Dies
 

The Cherry Blossom Dies are small enough to fit in Stampin'Up!'s Mini Die Cut & Emboss machine. Are you reading this in March of 2022?  There is currently a Sale on the Mini Diecutting and Embossing Machine and selected die bundles. Check out the sale here

Thanks for stopping by today. I hope I've inspired you to go play and make something INKcredible.


Follow my Facebook page
to keep up with my daily crafting


When placing an on-line order 
please make sure you have
Katie Johnson listed as your demonstrator
So I can send you a Thank-you Card
If you don't choose a demo, you'll be randomly assigned a demo
 
I do appreciate your business - Thank-you!
Click here to browse all the current product

 
 Here are links to the products used on today's cards
. . . to help you be INKcredible!

Friday, March 18, 2022

Tips for Working with Vellum

Vellum papers are a tight weave translucent material.  They provide a variety of options for adding artistic touches to a project. You'll often see vellum used as an overlay to mute the colors behind it. Vellum can easily be punched and die cut. Think about those super elegant looking invitations an announcements.  Or awesome projects with lots of leafy foliage sprays peaking out behind a focal point.

Color and texture options: Vellum is typically a milky white translucent color, but color can be added during the manufacturing process. The entire sheet can be colored and images can be printed on it. This tight weave paper is typically very smooth, but texture can also be added during manufacturing.  In addition to the traditional vellum, Stampin'Up! currently has 3 options for vellum papers: 


Is your brain whirling with possibilities right now?  If so there are 2 issues you need to plan for.

  1. choose your adhesive carefully,

    the fact that vellum is translucent means adhesive may be visible through the paper

    one solution is to hide the adhesive behind an element on top the vellum . . . for a project like the card to the right, the adhesive can be hidden behind the flowers glued on top of the vellum doily

    another solution is to uniformly cover the vellum with adhesive, a double sided adhesive sheet works well for that

  2. plan for extra drying time for any ink you add

 You can use vellum to create a variety of special effects on a project. 

Click here to see all the vellum products Stampin'Up! currently carries.

I hope this has given you some ideas for being creative with special papers and that you have an INKcredible day . . .


Follow my Facebook page
to keep up with my daily crafting


When placing an on-line order 
please make sure you have
Katie Johnson listed as your demonstrator
So I can send you a Thank-you Card
If you don't choose a demo, you'll be randomly assigned a demo
 
I do appreciate your business - Thank-you!
Click here to browse all the current product