Friday, December 23, 2011

Customer Loyalty Rewards Program

This Rewards Program is my way of saying “thank you” to the people who support me.

As a company, Stampin’UP! believes strongly in developing the customer/demonstrator relationship. You support me when you purchase through me and this is my way of saying “thanks”.

Earn 1 loyalty point for each $25 you spend in catalog merchandise. Redeem your points for free catalog product beginning when you’ve accumulated 6 points.

Here’s how it works
Orders must be placed through me.
   Place your orders online or email me your order - Excludes workshop orders
For every increment of $25 of catalog merchandise purchased you earn 1 point
   **an order of $50 or more = 2 points
   **an order of $49.95 = 1 point
   **an order less than $25 does not earn any points
• Amounts over the $25 increment do NOT carry over.
**one order of $28 is 1 point
**a second order of $47 is only 1 point
AND, product orders over $150 ALSO earn Hostess Rewards from Stampin’UP!
**an order of $150 = 3 Loyalty Points PLUS $25 additional free merchandise
Merchandise total only (i.e. before shipping & handling and sales tax)
   Excluding Hostess Dollars and 50% off items
YOU have to keep track of your orders – use this handy tracking sheet. Just email me with your point totals and after I’ve verified them you get your free product.
Points expire 2 years after the purchase.

Use your Loyalty Points like Hostess Dollars
You may begin to redeem them when you have accumulated 6 points.
Earn 6 points and get $5 to spend in the catalog.
Save them up and earn more according to the chart below.

  6 points  =    $5 free merchandise
  8 points  =    $8 free merchandise
10 points  =  $11 free merchandise
15 points  =  $17 free merchandise
20 points  =  A Free Stamp SET*
This program may be revised when new catalogs are issued.

DateStampin'UP! Order #Merchandise TotalPoints earned


Email Me to Redeem your Loyalty Points,  StampLadyKatie@aol.com
  • Order your Stocking Punch
  • Check out the Clearance Rack for amazing sales on clearance items
  • Remember items in the Holiday Mini are available only through Jan 3rd.
Contact me with any questions

Happy stamping
--Katie

Thursday, December 22, 2011

Stocking Builder Punch - Get it Before its Gone!

Get the Stocking Builder Punch before its gone! Stampin'UP! has just announced that the Stocking Builder Punch will not be carried over into the next catalog. This was a huge surprise to demonstrators. Usually Stampin'UP! uses the mini-catalogs to introduce new tools and its very unusual for such a versatile, popular item to not be included in the next catalog. 

There are so many ways you can use this punch:
*first the stocking can face either direction
*you can add interest by texture embossing the paper or using printed paper
*cut off the tops and turn them into baby booties
*turn the stocking upside down and make a horse, or zebra, or hobby horse
  - - then add antlers and turn it into a reindeer
*turn the stocking into an iceskate, soccer shoe, elf shoe
*use the stockings upside down as ears of a dog
*use the cuff as bricks in a fireplace
*use the toe and heel pieces as fall (fallen) leaves 
*use the heel piece as a candle flame
Oh my goodness, I CAN NOT believe we're losing this punch!

And of course it probably means we'll never see the matching stamp set again either. Check out the The SplitCoast Gallery for this punch and Stamp set to get an idea of some of the things you can do with them.  Or do a GOOGLE image search for this punch and you'll see why this announcement was so disappointing.

I had great plans for this punch. Here is one design I was playing with. The top cuff makes a great brick. I used the heel and toe pieces to make the fire flames. The green candle  and the logs were punched with the Word Window punch (but you could just cut a strip of paper too). The candle flame is the heel piece. The Mug on the mantle is the cuff and the picture below shows how I used the toe piece to make the mug handle.


Do you have this punch yet?  Don't miss your chance.  If you want this punch you need to order it before Jan. 3rd. Actually, the wording of the announcement was that once the "current inventory" was depleted it would no longer be available. Place your order on-Line or attend the Christmas Card Thank-You Stamp Camp on Wednesday Dec 28th and place your order then. By the way, you can RSVP for this event on-line.


Here are the item details if you want to get this punch now:
Stocking Builder Punch
 . . . . . . . . . . . . .  = item # 124095 . . . $16.95
matching Stitched Stockings Stamp Set
. . . wood mount = item # 123782 . . . $27.95
. . . clear mount = item # 123784  . . . $19.95

Contact me with your order or place the order yourself online HERE

And, this post would be a good place to announce my new Customer Loyalty Rewards Program. For every $25 you spend you earn a Loyalty Point, good towards catalog product. The grand unveiling will come in the next post but you can read the details here. This is retroactive to December 1st of 2011. Watch for details in tomorrow's post or download the explanation HERE.


Happy Holiday and Happy Stamping
--Katie

Wednesday, December 21, 2011

Plant Hope for Christmas Gift Cards

Card made with Stampin'UP! stamp set called: Plant Hope. Made by StampLadyKatieHere is an idea for a Holiday Gift Card. The evergreen tree image is from a stamp set called: Plant Hope.  This stamp set, which includes a palm tree and a bonsai tree is really very versatile. It covers a variety of themes and seasons. And really, for Christmas, don't you think the name of the set is very appropriate?  Plant Hope.

The 3x3 size is perfect for a gift card. The evergreen trees from this set fit nicely onto the face of a 3x3 notecard. Stampin'UP! sells the 3-1/8 x 3-1/8 envelopes (item #107309) to fit this size card. We don't sell the cards, but they're so easy to make. Just cut a piece at 6" x 3" and fold in half.

Card made with Stampin'UP! stamp set called: Plant Hope. Made by StampLadyKatieDo you like the sparkle on the trees? The "lights" you are seeing come from the Iridescent Ice embossing powder. I love this stuff.  It gives a wonderfully subtle sheen to my projects. Check out this example from last year which also used the Iridescent Ice on evergreen trees. Do you have a Heat ToolThis is one of my favorite Embossing Powders.

The trees themselves are not embossed so to get the embossing powder to stick to the image I first inked the trees in Versamark and then in black ink before stamping on the paper. Then sprinkled with the embossing powder. The Versamark keeps the embossing powder on the card, yet does not mess up the black ink pad. Of course, I have to clean the stamp before I make the next one.

You can get your own Plant Hope Stamp set, Mini Envelopes and Iridescent Ice embossing powder HERE,
shop online 24/7
*107309 . . .  Mini Envelopes
*101930 . . . Iridescent Ice Embossing Powder

*100005 . . . Heat Tool
*117042 . . . Plant Hope (wood Mount)
*120540 . . . Plant Hope (clear mount)


Other things to remember:
  • The Clearance Rack Blitz goes through Jan 3rd, Get up to 80% off selected items in the clearance Rack - including many of the old style punches
  • New Catalogs coming soon: Be watching your mailbox for your copy of the Sale-a-Bration Catalog and the New Occasions Mini Catalog. 
  • Don't miss your chance to get your favorite items from the Holiday Mini. Items from the current Holiday mini catalog are available only through January 3rd.


Happy Stamping and Happy Holidays
--Katie

Friday, December 16, 2011

Double Embossed Simple Lay-Out

Card made with Stampin'UP! set called Dasher. Made by StampLadyKatie
Here is a really simple lay-out. Just cover the bottom half of the card with something special and add your focal piece over the seam. The added WOW on this card is the Double Embossing: heat embossing and dry embossing.

The Stamp used here is called Dasher. He's so beautiful, I just love the swirly antlers. He deserved something really special so he's embossed in gold. 

Dasher is one of the ala carte stamps, meaning that it is sold alone and is not part of a larger set.

The sentiment is from a Set called Sincere Salutations. With 8 different sentiments to choose from this is one of the most versatile sets I own, ask the people who come to my stamping events - they see this set ALL the time! 

The colors used here are Very Vanilla, Early Espresso and So Suede. I love how well the Chantilly ribbon goes with these colors.  The bottom piece was embossed using the Petals a Plenty embossing folder in the Big Shot machine. Although if you don't have an embossing machine this card would look great with just the smooth cardstock on the lower half. The Early Espresso strip was punched with the Scallop Border Punch.

We did this card on Wednesday at the Oregon Sr. Center. For most of the people there both the heat embossing and the embossing with the Big Shot were new skills. The ladies did a really good job working with these new tools and the cards turned out just beautifully.

Speaking of trying new things:
Did you play along with the lay-out challenge last Friday?  If you did I'd love to see a photo of your creations.

And here's a new challenge for this weekend. Can you see how this is the lay-out for today's Dasher card? I just added a ribbon. The size proportions don't have to be exact. Its just a general guide to the lay-out.

Here's another example from last November. Click on the image to see the details of how that card was made.


Things to remember:
  • New Items have been posted to the Clearance Rack - including current punch shapes in the old punch style. Click HERE to see them.
  • This is the last month of the current Mini Catalog. Make sure you don't miss out on something you've been wishing for.
    *Click HERE to see the current Mini Catalog
    *Click HERE to see the Main Catalog
  • NOW (today or this weekend) is the time to buy any stamping products that you intend to use as Holiday gifts for this season Normally Stampin'up! is able to process the order and have it in your hands within 8 days. But during the holiday season you do not want to wait until the last minute.
Have a wonderful weekend - I hope you're able to relax and enjoy some stamping. Send me photos of the projects you make with this week's lay-out challenge.

Happy Stamping
--Katie
Remember: you can shop on-line 24/7 and have your order delivered direct to your house. Less time in the stores and your car and more time for stamping!

Thursday, December 15, 2011

New Items on the Clearance Rack - Including Current Punches

Clearance Blitz starts today. Stampin'UP! just announced the addition to the Clearance Rack of current punches in the old style.  Actually there are over 200 products that have been added - many are discontinued items. I just checked the clearance rack and all I can say is WOW!  There are all the current punch shapes in the old style punches at some truly amazing prices


Check out the On-Line Store and place your order now,
at these prices this stuff is not going to last long
.

Here's a few details about this special:
  • Dec 15th to January 5th
  • Only demonstrator and online orders qualify for this promotion. (i.e. not workshops)Check out the online store & place your orders on-line or contact me with your order.
  • Orders can include non-Clearance Rack items, as well.
  • The Clearance Rack Blitz includes old-body style punches.
  • There is no minimum purchase required to participate in this promotion.
  • Qualifying Clearance Rack orders are eligible for Hostess Benefits.
      *Which means if your order is over $150 you ALSO get Hostess Benefits.
       - - that's $25 of additional merchandise FREE
  • After Jan 5th unsold items may or may not stay on the Clearance Rack
  • Clearance Rack Blitz items are only available while supplies last. 
  • There are no refunds or exchanges on Clearance Rack items.

Available only while supplies last

Check the Clearance Rack NOW

Buy Yourself a Present


Happy Holidays and Happy Stamping
--Katie

Wednesday, December 14, 2011

Take the Extra Step to add some WOW


There are lots of ways to add some WOW to your cards. You can add extra layers or texture or add a ribbon or something that sparkles.

This pair of cards was stamped with Always Thankful, which is in the current Holiday Mini catalog. The cards were stamped in Staz-On and colored with markers and blender pens.

Card #1 makes a nice simple statement. The Early Espresso layer behind the focal piece helps draw your eye to the image and the distressed edges help set the tone.

Card #2 really has an added "wow" factor. The extra layer of More Mustard behind the focal piece really makes a statement. The color alone has a striking visual appeal. The texture also adds to the impact (this was created using the new Snow Burst embossing folder also in the Holiday Mini). The Linen Thread and Antique Brad add to the overall balance of the card.


Both of these cards are nice. We did these at the November Stamp-a-Stack and people had a choice as to which one they wanted to make.

 
Here's another pair of cards. The image is from a set called Flower Fancy. Again it was stamped in Staz-On and colored with markers. The vase is the ornament punch with the bottom cut off.

Card #1 is a nice card by itself. The 2 different color layers are a nice way to balance the colors used on the image. And the texture on the vase adds interest and balance to the card. 

Card #2 just has that extra "Wow" with the bow.

What's your favorite way to add "wow" to your projects?  Leave a comment below.

Remember I'm always here to answer any stamping questions. Leave a question as a comment below or email me.

If you like what you see here then email a friend to check out this blog.


Do I have your creative juices going yet? Are you participating in the Weekend Challenge from last Friday?  If so then email your photos to me by this Friday and I'll post them this weekend.

Happy Stamping
--Katie

Monday, December 12, 2011

Punch Art Snowman Card

Snowman Punch Art card designed by StampLadyKatie
This punch art snowman card is one more in the series of alternate greetings. This was another of the cards we did at the December Stamp-a-Stack. In case you missed the others you can see them here:  Card #1, Card #2 and Card #3. Participants at the Stamp-a-Stack had a choice of greetings to put on the card.

One of the things I really appreciate about Stampin'UP! stamps is how they're designed to be interchangeable. You can change the sentiment or the image and make a totally different card.  This card uses a sentiment set called Sincere Salutations, which is a great set, so versatile and all the images are the same size. So this little snowman could be saying "happy birthday", "thinking of you" or even "good luck"!
Snowman Punch Art card designed by StampLadyKatie
Here's a few details on this little guy: 
The fence was stamped with the background stamp: Woodgrain and then scored to look like panels in a fence.

The snow at the bottom was created by tearing the edge and then adding a line of Dazzling Details

The hat is the Round Tab Punch and the Word Window punch.

The greeting layer was punched with the Decorative Layer punch, both the white and the red. Study the images below to see how we got the red to layer behind the white.

Did you miss this class? If you are local to the Dane county Wisconsin area then be sure to check my events calendar. Join us to learn new stamping tricks and meet some great people.

And whether you are local or not, be sure to check back soon for details about a Punch Art class by email that I'll be unveiling this week.  Better yet, sign up for my newsletter HERE and be the first to hear about this On-Line Punch Art class.

I'm always available to help with your stamping questions. Whether you are local or not, feel free to contact me with any questions.

Happy Stamping
--Katie

PS:  Are you playing the design challenge this week (scroll to the bottom of this post for details). Email your designs HERE and I'll post them online.

Saturday, December 10, 2011

Cookies and Toys and Holiday Gifts

Stampin'UP!'s founder, Shelli Gardner, was on the Today show this week to help promote the Toy Drive. Stampin'UP!'s donations are all about creativity and sharing time with your children. And what better way than with the Cookie Press Stamps! Read watch the video below. You can read more about the TODAY Show's Holiday Toy Drive HERE.


Give the gift of time spend with your kids. Crafting items are a perfect way to encourage quality creative time with children. And while Stampin' Up! is donating over $500,000 worth of stamping and paper crafting products its worth mentioning that Shelli featured the Cookie Press Stamps. You can be just as creative in the kitchen as on paper (and its more yummy!)

And the kids can have just as much fun packaging the cookies to give as gifts. See a Sample cookie package here.

Who is on your Holiday Gift List?  Order your Cookie Press Stamps HERE or contact me directly at StampLadyKatie@aol.com.  Buy one set for your own family and another set to give as a gift. Buy a 3rd set to give as a gift to a local gift drive charity.


Choose creative crafting supplies for all your gift giving needs 
and do your holiday shopping from the comfort of your own home.
Kick back
grab a cup of your favorite beverage
grab your stampin'UP! catalog or shop on-line

And REMEMBER: if your order is over $150 you automatically get Hostess Benefits!

as always, contact me with any questions, I welcome customer feedback

Things to Remember:
  • Remember the Weekend Challenge from Friday's Post. See the challenge HERE. Send your entries in this week and I'll post them next Saturday.
  • Remember the Hostess Special ends Dec 15th.  You can Host a Book Party and earn the extra $35!

Happy Stamping
--Katie


Friday, December 9, 2011

Lay-Out Ideas - December Card #3

Participants at the December Stamp-a-Stack were offered choices. I had a model card out with a choice of sentiments. You could have turned the card into a Christmas/Holiday card or created a generic greeting card.

There was also some flexibility on the overall design, some more than others. We did 5 cards total. You can see Card #1 here, and Card #2 here. Turns out people seemed to like the opportunity to change up the designs a little and really take some ownership of the card.  

 This card offered 2 main choices -  a choice of which stamp image to use and a choice of lay-out: vertical or horizontal.

This card challenge really illustrates the advantages of buying stamps in sets.  You can create 1 design and then interchange the images to make different cards. These images were from a stamp set called Easy Events.

We also played with Crystal Effects. This stamp set is so cute. I managed to find the perfect place to add just a little bit of Crystal Effects on each different image. And its perfect for the clock face on the coo-coo clock.


What stamp sets do you own that could work with this design?  What colors would you choose to use with the stamps?  Lets get those creative juices flowing.

Today is Friday so here is a Weekend Challenge for you. If you have time to play this weekend, try playing with these designs.  Send me pictures of your projects this week and I'll publish them on this website next weekend.
**Please send only photos with Stampin'UP! stamp sets.
**Your dimensions don't have to match exactly what I've shown.
**Use 2 stripes of 2 different colors and a layered central image.
**You can make your sample vertical or horizontal.
**Use what ever embellishments you want.
**The stripes can be centered or off-set (see the two images above). Play with it and and have fun and let me see what you make.

Send your samples to:  StampLadyKatie@aol.com along with your first name and last name and city and state. I'll give credit by first and last name or first name only if you prefer, just let me know.

Happy Stamping
--Katie
Here to help make your stamping experience more productive and more fun.

Thursday, December 8, 2011

Embossed Medallion Background Stamp

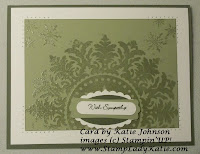
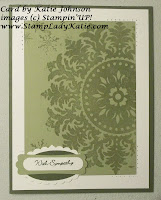
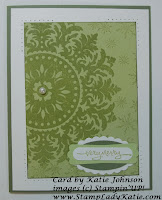
Card made by StampLadyKatie using the Stampin'UP! Medallion Background Stamp.
Here is another flexible card design. The main image on this card is the background stamp: Medallion. We stamped the medallion in Versamark and then embossed with Clear embossing powder. The snowflakes are from a stamp set called: Serene Snowflakes. They were also stamped in Versamark but they were not embossed.

Yikes! These photos are terrible.  I must have been standing off to an angle instead of looking straight on. I can't make the corners all look square in the images.  And the colors are the same but I took the photos in different rooms with different lighting. I'll really have to work on my photography skills. 

I love how Stampin'UP! supports their product, specifically how the stamp sets are designed to work with the punches. The sentiment on this card was punched out using the Word Window Punch. The sentiments on these cards come from 2 different stamp sets: Teeny Tiny Wishes and Short and Sweet. The other layers for the sentiment are the Modern Label Punch, the Large Oval Punch and the Scallop Oval Punch.

I added a little extra pizzazz on this card with the pierced holes around each corner. The holes in the Mat Pack template are perfect for creating a line of perfectly spaced holes in a perfect line. I consider the Mat Pack to be one my 3 essential tools for stamping.

This trio of cards was part of the December Stamp-a-Stack, which offered the participants a choice of sentiments. They could use my model to make a Christmas card or a generic greeting card. This was card #2 out of 5. See card #1 in yesterday's post. Actually the bottom card here is the one I offered as a model at the Stamp-a-Stack. The other two cards were created as variations on the original.

Card made by StampLadyKatie using the Stampin'UP! Medallion Background Stamp.

Card made by StampLadyKatie using the Stampin'UP! Medallion Background Stamp.
If you like what you see here then be sure to Sign Up for my Newsletter. 
#1 - You'll get reminders of my events where you can make these cards for yourself
#2 - You'll get immediate notification of Stampin'UP! promotions and specials
#3 - You'll get a monthly newsletter with other exclusive samples and how-to's
#4 - there is a signing bonus that "ewe" won't want to miss!
SIGN UP HERE

Happy Stamping
--Katie
I'm here to make your stamping experience more pleasurable and more productive.

Supply List for this project:
Cardstock: Always Artichoke
Cardstock: Shimmery White
Cardstock: Pear Pizzazz
Punch: Word Window
Punch: Modern Label
Punch: Large Oval
Punch: Scallop Oval
Tool: Mat Pack 
Stamp: Medallion


Wednesday, December 7, 2011

Flexible Cards for December

The December Stamp-a-Stack featured Flexible Cards. What I mean by that is that you could use them as Christmas cards if you wanted to, but they would not have to be Christmas cards.

Its always a challenge this time of year to satisfy everyone's needs. Some people look forward to this event as a source of holiday greeting cards but others don't send Christmas cards.

For the top card we used a Holiday Greeting from a stamp set called Many Merry Messages. As an alternative people could choose any of the sentiments from Heard from the Heart.

This truly is one of the wonderful things about Stampin'UP!  I really appreciate being able to create 1 design and then use it for more than one card. Oh yes, you can argue that we changed the design a little. Bow and snowflake on the right or the left. The row of self Stick Rhinestones under the word or at the end of the sentiment layer. But basically its the same card.
Holiday card made using Stampin'UP!'s Northern Frost Die and the Snowburst Embossing Folder. Card made by StampLadyKatie

Holiday card made using Stampin'UP!'s Northern Frost Die and the Snowburst Embossing Folder. Card made by StampLadyKatie

Stamping at Katie's HouseThe stampers really had fun with this. They had to make so many choices this time. And it was not just choices about sentiment or left and right. These cards really encouraged people to be creative. I'll post some more of what we did later this week.  

Did you miss the fun? 
Be sure to join us for the next event 
Sign up NOW for an upcoming event. 
Dec 28th = Christmas Thank-You Notes
Jan 8 & 9 = the January Stamp-a-Stack


Another wonderful thing about Stampin'UP! is the relationship you have with a demonstrator. It does no good to invest in stamping supplies and then sit at home without the inspiration or expertise to use your product. Thats WHY people come to classes. And I want to be YOUR demonstrator - be sure to check my events calendar here. It's usually posted at least 3-4 months in advance.

Stay informed about updated schedules. There are several other classes in the works that are not yet on the calendar. If you want to be sure you know about additions to the class schedule then SIGN UP FOR MY MAILING LIST HERE Don't miss out on the fun!

Check back later this week to see more of the flexible cards we did this weekend.

Happy Stamping
--Katie
Here to make your stamping experience more enjoyable and more productive.

Tuesday, December 6, 2011

Big Shot Projects from the December Class

These are the projects we did at the December Big Shot Class. In past Big Shot classes our projects have included both cards and 3D projects. This month all 5 of the projects were 3D projects.

Big Shot Projects by StampLadyKatie Big Shot Projects by StampLadyKatie
You might also like to see the November Projects


What is the Big Shot? The Big Shot is a die cut tool used by paper crafters. This machine is more than a die cut machine, it also embosses designs into your paper.

What kind of projects can you make with this tool?  The embossed paper and die cut shapes can be used to decorate 3D projects as well as to decorate cards and scrapbook pages.  And many of the dies are actually templates that you fold into 3D projects.This machine has quickly become an essential addition to my work room. I use it all the time!

We used 6 different dies this month.
  • Three of them are NEW dies which you'll find them in the Holiday Mini Catalog. The Stocking Bigz L Die, the Stocking Accents Originals Die  and the Peek-a-Boo Frames Bigz L Die.
  • We also used the Matchbox Bigz XL Die, the Northern Frost Die and the Mini Milk Carton  Bigz L Die .

Can I use these Dies with other Die Cut Machines? You mean like the Cuttle Bug?  Any die will work in any machine it can fit into. The trick is to get the right thickness, the right amount of pressure from the roller onto the paper and cutting edge. As long as the die fits into the "bed" of the machine then you can use it. You may have to play with the layers to get the "sandwich" to an effective thickness. 

The thickness can be adjusted but the width of the die can not.
*The Sizzlets and Originals dies will work in the Cuttlebug.
*The Bigz L and Bigz XL dies are too wide to fit  through the Cuttle bug.
Thats why the serious stamper needs a Big Shot.

Get your Big Shot, dies and embossing folders HEREShop 24/7 for all your stamping and scrapping needs at my Stampin'UP! store  Whether you are local or long distance you can be confident that I'll be here to answer all your questions.

Was this useful information?  Send your Friend an email link to this article.

Do you still have questions about die cut machines. Email me. I answer all questions, I'm here to help you.

Thanks for stopping by 
--Katie
Here to help you will all your paper crafting!

Monday, December 5, 2011

The TODAY Show's Holiday Toy Drive

At Stampin' Up!, we believe in making a difference in the lives of others--whether they're our demonstrators, our employees, the people who use our products, or children in need of a way to express their creativity.
Since 2005, Stampin' Up! has been honored to participate in the TODAY Show's Holiday Toy Drive. This year, Stampin' Up! will be donating over $500,000 worth of stamping and paper crafting products to the following organizations:
  • Action for Boston Community Development Inc.
  • Alliance for Children's Rights
  • Boys & Girls Clubs Harford County
  • Catholic Charities of the Archdiocese of New York
  • Community Partners of Dallas - Rainbow Room
  • Diocese of Saint Augustine
  • Friendship Project
  • Help USA
  • Interfaith Nutrition Network (INN)
  • Kids In Need Foundation
  • National Council of Jewish Women, Cleveland Section - The Dignity Project
  • Operation Homefront
  • Puerto Rican Family Institute
  • St. Luke's Roosevelt Hospital
  • Stephen Siller Foundation/Katrina Fund
  • Welcome House
  • Youthbuild USA
In conjunction with the donation, Stampin' Up!'s Shelli Gardner will make an appearance on NBC's TODAY Show on Tuesday, December 6. We are honored and excited to once again participate in this annual holiday tradition of giving back and making a difference!

I am so proud to be associated with this company.
Happy Stamping
--Katie
Here to make your stamping experience more pleasurable and more productive.

Saturday, December 3, 2011

STAMPING OFF: 2-Step Stamping with Gently Falling

The stamp set "Gently Falling" is a 2-step stamp set.  It's featured in the current Holiday Mini Catalog. (see the mini catalog on-line here). A 2-step stamp set comes with 2 matching images and is intended for you to stamp one on top the other.

If you love the outdoors you'll love the variety of leaf shapes in this set. And the fact that it has the acorn and maple seed images.

With 2-step stamping you want to find a way to distinguish the 2 different images. One way would be to color the veins of the leaf a different color from the body of the leaf. If you follow this blog then you'll recognize these 2 projects from previous posts.
Card made by StampLadyKatie with Stampin'UP! set: Gently Falling   Card made by StampLadyKatie with Stampin'UP! set: Gently Falling
When you want both the leaf and the veins to be the same color then try Stamping Off


The technique of stamping off involves stamping more than one time without re-inking. Each subsequent stamp you make will be lighter than the one before. In this sample both the veins and the leaf body were stamped in the same color!  To make this image the veins were stamped full strength. The body of the leaf was stamped off before applying over the veins so it would be lighter and the veins would stand out. Stamping off is a fun technique. Watch for another stamping off sample with this set soon.

And if you like the idea of 2-step stamping then consider a 2-step set called Green House Garden. Check out the 2-step stamping with this set.

Was this useful information? Please pass it along to your friends. Your friends might appreciate the idea and I'll certainly appreciate having more people know about me. 
  • If you are local you can attend events with me and learn more techniques. 
    Next event: Sunday afternoon starting at 1PM or Monday evening starting at 6PM
    View the full calendar and register on-line HERE
  • Get the Gently Falling Stamp set HERE
    Your choice of wood mount or clear mount.
    Shop 24/7 from the comfort of your own home
Happy Stamping
--Katie
Here to make your stamping a more pleasurable and productive experience.

Friday, December 2, 2011

How to Choose the Right Clear Block

Are you a fan of the new Clear Mount stamps?  If you're not sure the advantages of one over the other then check this post from September that discusses the differences between clear mount versus wood mount. If you do decide to  purchase clear mount stamps then be sure you have the right size clear block to use with the stamps you buy.

Stampin'Up! carries 9 different size Acrylic blocks for our clear mount stamps. And picking the right size block for the image is really easy! Did you know that both the image in the catalog AND the image on the cover of the clear mount stamp set are printed ACTUAL size. That makes it easy to choose the right block. Just lay the block over the image to see if it fits. And be sure you saw yesterday's post about choosing the right size punch for your image.
 

Stampin'UP! also carries a sturdy plastic storage case for your clear blocks. I love my case for 2 reasons. First it keeps the blocks safe so they're not rattling against each other in a box. The case has a separate compartment for each block.

But I really love that I can see at a glance if they're all there or if one is lost in the mess on my desk. I helps me keep organized (and believe me, I need all the help I can get!) An empty hole in the case means I have a missing block somewhere.

Here's a little shopping tip. If you really have a preference for wood or clear mount, Stampin'UP! makes it easy to shop your preference. Just click the appropriate choice from the left menu on the shopping page.

Click HERE to see it live. And while you're there be sure to check the Clearance Rack. The product there changes constantly but you'll be sure to find some great bargains. Browse the Stampin'UP! store, shop on-line and have it delivered to your door. Life made easy.

Happy Stamping
--Katie
Here to make your stamping experience more pleasurable and more productive.