Friday, March 18, 2022

Tips for Working with Vellum

Vellum papers are a tight weave translucent material.  They provide a variety of options for adding artistic touches to a project. You'll often see vellum used as an overlay to mute the colors behind it. Vellum can easily be punched and die cut. Think about those super elegant looking invitations an announcements.  Or awesome projects with lots of leafy foliage sprays peaking out behind a focal point.

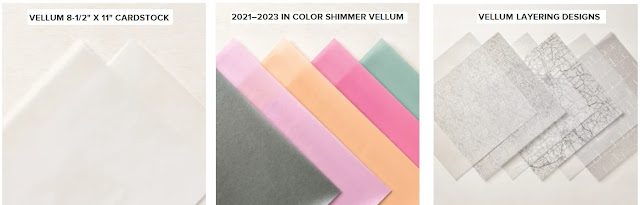
Color and texture options: Vellum is typically a milky white translucent color, but color can be added during the manufacturing process. The entire sheet can be colored and images can be printed on it. This tight weave paper is typically very smooth, but texture can also be added during manufacturing.  In addition to the traditional vellum, Stampin'Up! currently has 3 options for vellum papers: 

Is your brain whirling with possibilities right now?  If so there are 2 issues you need to plan for.

  1. choose your adhesive carefully,

    the fact that vellum is translucent means adhesive may be visible through the paper

    one solution is to hide the adhesive behind an element on top the vellum . . . for a project like the card to the right, the adhesive can be hidden behind the flowers glued on top of the vellum doily

    another solution is to uniformly cover the vellum with adhesive, a double sided adhesive sheet works well for that

  2. plan for extra drying time for any ink you add

 You can use vellum to create a variety of special effects on a project. 

Click here to see all the vellum products Stampin'Up! currently carries.

I hope this has given you some ideas for being creative with special papers and that you have an INKcredible day . . .


Follow my Facebook page
to keep up with my daily crafting


When placing an on-line order 
please make sure you have
Katie Johnson listed as your demonstrator
So I can send you a Thank-you Card
If you don't choose a demo, you'll be randomly assigned a demo
 
I do appreciate your business - Thank-you!
Click here to browse all the current product


Thursday, March 10, 2022

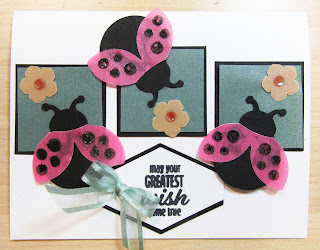
Ladybug Trio on Shimmer Vellum

Do you get a smile on your face when you see a ladybug?  Check out this fun layout featuring a trio of ladybugs.

Ladybug Card made with Stampin'Up!'s Hello Ladybug Stamp set and Ladybug Builder Punch

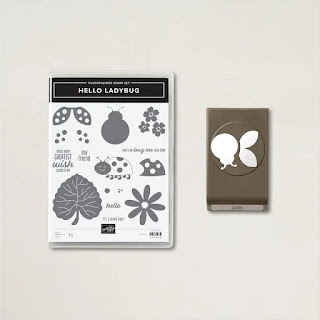
Ladybugs are important for the garden of course, but you see them everywhere in the stores too from clothing to accessories and more. Which makes it even more fun to play with Stampin'Up!'s new Hello Ladybug stamp set and Ladybug Builder Punch. The stamp set and the punch are currently bundled for 10% savings.

Stampin'Up!'s Hello Ladybug Stamp set and Ladybug Builder Punch

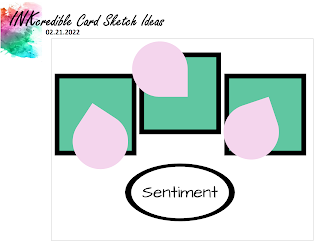
This is a versatile layout.
By positioning the ladybugs offset it gives the illusion that our little girls are crawling around. It doesn't have to be the ladybugs - you could use this layout using any shape. Try hearts, or snowflakes or flowers. 

INKcredible Card Sketch

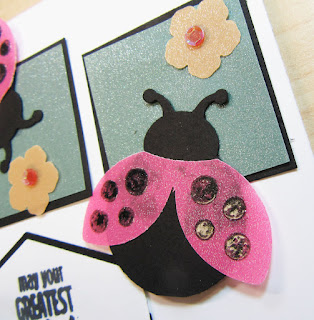
This card also features some A.W.E.S.O.M.E  colored shimmer vellum.  OMG this stuff is great. The next post will feature a few tips for working with shimmer vellum.Check it out from a side view, sparkly and eye-catching. The extra shine is the black heat embossing for the ladybug's spots.

Ladybug Card made with Stampin'Up!'s Hello Ladybug Stamp set and Ladybug Builder Punch

If you like watching projects being made I did a quick (13 min) video of this card which you can see here.

Thanks for stopping by today. I hope I've inspired you to go play and make something INKcredible.


Follow my Facebook page
to keep up with my daily crafting


When placing an on-line order 
please make sure you have
Katie Johnson listed as your demonstrator
So I can send you a Thank-you Card
If you don't choose a demo, you'll be randomly assigned a demo
 
I do appreciate your business - Thank-you!
Click here to browse all the current product

 
 Here are links to the products used on today's cards
. . . to help you be INKcredible!

Monday, February 7, 2022

My Top 5 Essential Tools for Card Making


Essential Tools for Stampers

1.Paper Trimmer
152392s Unless you're buying pre-cut notecards you need a paper trimmer.

Make sure your trimmer has these features:
  1. the grid lines go the full length of the trimmer bed
  2. it should have both a cutting blade and a scoring blade
  3. you should be able to move the blade not in use out of the way i.e. past the edge of the paper you're cutting
  4. it should have an extendable arm for cutting 12x12 paper
2.Stamparatus
146276s Its a convenience yes, but so much more. A stamp positioning tool helps with a variety of special stamping techniques such as reflection stamping, split negative, wreath stamping, and more. Make sure your stamp positioner has
  • removable plates for easy cleanup 
  •  and a bed that is open on 2 sides for larger sheets of paper. 
The unique - and very useful - feature of the Stampin'Up! Stamparatus is the adjustable hinge positions for the plates. This allows even greater versatility for special inking techniques.
3.Silicone Craft Sheet
127853s This must have tool has a variety of uses.
  • Its a good non-stick surface for working with adhesives, make a puddle of liquid glue for "painting" or dabbing on detail dies. Tough enough to handle a hot glue gun.
  • it is translucent which makes it useful for image positioning with the Stamparatus 
  • it is non-porous and can therefore be used for reflection stamping. Or use as a pallette for watercolor.
4.Take Your Pick
144107s The tool you never imagined you needed.
The pointy end: good for positioning self-stick bling as well as poking paper stuck in a detail die. Or pushing little bits to re-position, or holding things in place while moving other stuff.
The spatula end: good for removing self-stick bling and lifting layered pieces to insert another layer.
The putty end: great for moving small bits.
The putty cap: good for pushing down rhinestones to ensure they are secure.
And 2 different size stylus ends. Yep, didn't think I needed it - now don't want to be without it.
5.Clear Wink Of Stella Glitter Brush
141897s An easy way to add subtle sparkle to a project.

PLUS, you can use it like a water pen and grab some ink from a pallette - the Wink of Stella is easy to clean.

I keep an extra on hand at all times because I go through so many of them.


I'd to hear your favorite tools in the comments.

Click here to shop for these or any other Stampin'Up! product.

Contact me with any questions. My job as a demonstrator is to help you have the best possible experience with your papercrafting. 


Tuesday, October 12, 2021

Emboss Resist with a Watercolor Wash

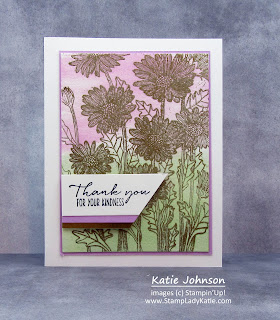
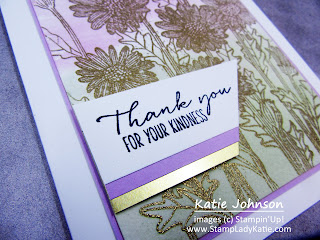
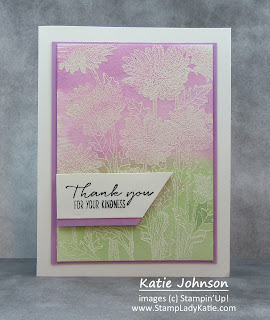
Here's a project that combines 2 techniques:we create a colorful background with a watercolor wash and our focal point "pops" with an emboss resist.

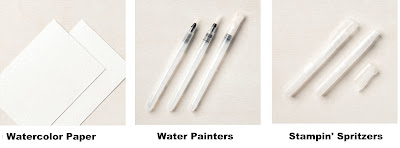
Each of these projects was made with watercolor paper. For easy movement of the ink you'll want to start with damp paper.  Stampin'Up! does sell a Spritzer that creates a fine mist for good coverage.  

Stampin'Up! also sells a set of water painters. These are paint brushes with the water in the barrel of the brush, for easy no-mess painting. And the set has a wide bristle brush perfect for the watercolor wash technique.

The first sample was heat embossed in gold
. . . so the sentiment is highlighted with a small strip of gold foil

The resist technique looks great with white embossing too.

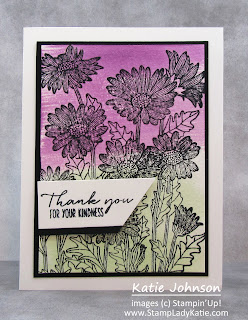
The watercolor wash technique works well with a black image too
just be sure to use StazOn, or another non-water soluble ink.

 Its easy to create a watercolor wash background, it looks good over plain black stamping and really "pops" with an emboss resist. Check out the supply list below. You'll probably find you already own much of what you need.  And I have easy buying links for you if you need any of these supplies or any other Stampin'Up! product.

Thanks for stopping by today. I hope I've inspired you to go play and make something INKcredible.


Follow my Facebook page
to keep up with my daily crafting


When placing an on-line order 
please make sure you have
Katie Johnson listed as your demonstrator
So I can send you a Thank-you Card
If you don't choose a demo, you'll be randomly assigned a demo
 
I do appreciate your business - Thank-you!
Click here to browse all the current product
 
 Here are links to the products used on today's cards
. . . to help you be INKcredible!


Tuesday, September 21, 2021

Fall Step Card

Today' project is an awesome fall Step Card. Elements of a fall card include the color scheme, leaf imagery and lots of layers and depth.  In addition to all the layers with the die cuts, a step card certainly offers depth.

Fall Step Card made with Stampin'Up! Beautiful Trees dies, Basic Border Dies and Stitched Greenery Die.

Where do you draw your inspiration for a project. Nature certainly offers choices. Sometimes we're inspired by product, for example I have these awesome new Basic Border Dies that I wanted to play with.I've also been enjoying the Beautiful Trees Dies. Then when I came across Joy Nelson's beautiful tree card made with scraps I knew exactly how I wanted to combine the two dies.

Stampin'Up! Beautiful Trees dies and Basic Border Dies

I could have just cut curves for the hills, but I like the look of the edge from the Basic Border Dies.

Fall Step Card made with Stampin'Up! Beautiful Trees dies, Basic Border Dies and Stitched Greenery Die.

The tree has lots of layers too. The branch die cut is sandwiched between the sparkly foliage layer  and a back piece die cut from vellum. Can you see the color variation in the foliage? I used some Ombre Specialty Paper - perfect for fall, right? 

Fall Step Card made with Stampin'Up! Beautiful Trees dies, Basic Border Dies and Stitched Greenery Die.


You can never have too many layers on a fall card, right? lots of depth and texture.  So speaking of inspiration, I decided to turn this into a Step Card when I saw Laurie LaRose's beautiful floral Step Card


Laurie's project is horizontal, mine is vertical. Hers is a center Step with 3-panels. Mine is a side Step card with 2 panels. If you like step cards check this horizontal Halloween Step Card. Bottom line is I liked it so much I made 2!

Fall Step Card made with Stampin'Up! Beautiful Trees dies, Basic Border Dies and Stitched Greenery Die.
 

Thanks for stopping by today. I hope you've been inspired to go play. Between my card and Joy's and Laurie's cards you've got lots of ideas to work from. Leave a comment, we'd love to know what you think of our cards.

Time to get out your craft supplies and go make something INKcredible!

. . . have an INKcredible day


Follow my Facebook page
to keep up with my daily crafting


When placing an on-line order 
please make sure you have
Katie Johnson listed as your demonstrator
So I can send you a Thank-you Card
If you don't choose a demo, you'll be randomly assigned a demo
 
I do appreciate your business - Thank-you!
Click here to browse all the current product
 
 Here are links to the product used on today's project
. . . to help you be INKcredible!