Showing posts with label Technique - Sponging. Show all posts

Wednesday, May 22, 2013

Fish Punch Art with the Blossom Petal Punch

Punch Art Fish card made with Stampin'UP!'s Blossom Petal PunchOne more punch art project with the Blossom Petal Punch.  Have you been following my recent posts?  If so you know how much I'm going to miss the Blossom Petal Punch after it retires the end of this month.


This was so easy to make.
  • The fish is made of 1 of each size petal in the punch.
  • The seaweed is also punched
  • the sand at the bottom is torn edges
The only special thing I did was to sponge the edges of all the punched pieces to give them a little definition and help them stand out from the background.


Stampin'UP! is in the midst of a Catalog Transition.  This punch is in the old catalog but will not be in the new one, so if you want the punch its best to order now.  In fact, I confess I wrote this last Tuesday and then went on vacation.  I hope this punch is still available.

Here are a few links to catalogs and retiring product lists
Retiring stamps will be available until we get the new catalog
but retiring accessories are available only while supplies last.

Contact me with any questions
Happy Stamping
--Katie
 
Join the Mystery Hostess Party: All on-line orders from my Stampin'UP! store earn Rewards Points. And all orders through May 23rd using the Hostess Code T3HCX3RU will be entered into a drawing to win the Hostess Benefits.  The more orders the more Hostess Benefits you could win.


Here's another way to get hostess Benefits: collect orders from your friends and as long as the total is over $150 you get Hostess Benefits.  If the total is over $350 and you place your order by May 30th you'll get an additional $30 of FREE product


Be sure to check out these additional savings


Tuesday, May 7, 2013

Praying Hands - Retiring Stamp Set

Here is another stamp set that is retiring the end of May:  Praying Hands.

Praying Hands is a little unique in Stampin'UP!'s product line because, while most stamps are sold in sets, this is a single stamp.   Praying Hands is a single, wood mount stamp sold for $7.95.

This card is another trade card, it was made by Lori Verdon.  I really like the effect Lori created on this card.  She stamped the hands and then sponged color lightly around them.  Don't you think this is a great way to highlight an image?

Be sure to check the lists of retiring product. I've made easy read versions of both lists and you can download the pdf files here:
If you see something on the list that you want - DON'T WAIT. Some accessories are already sold out.

Happy Stamping
--Katie


Sunday, April 14, 2013

Create a Wet Sand Look with Iridescent Ice Embossing Powder

The iridescent sparkle on these cards gives them a watery look and makes the sandy bottom look realistic.

This set of cards was made for a recent demonstrator trade and they were a bit of a "wow" because of the fish eye. These fish have eyeballs made from Crystal Effects. Yesterday's post explained how the fish eye balls were made.

Today's share is about the sparkle on the card and how to make the background.

The images on this card are from a stamp set called By the Tide.  This set has some wonderfully realistic images including the fish and the coral used on this card.

To get this look: stamp the coral 3 times. I wanted a bit of a slope for the sandy bottom so the one on the right was stamped higher.  

For balance: stamp 2 on the left and you can see in the image that one is stamped off the paper a bit so the "root" won't show.

The images are stamped in Sahara Sand ink and to get the sandy ocean floor you'd just sponge on more of the Sahara Sand ink.

The watery sparkle is Iridescent Ice embossing powder.  You  need something to hold the powder to the project while its being heat embossed.

On this project I used Versamark Ink to hold on the embossing powder.  Its kind of hard to see in the photo, but I left the center area free to get good adhesion when I attached the piece with the fish.

Don't you think it looks just like wet sand?

Iridescent Ice is a wonderful product. Its a quick and easy way to add sparkle to a project. I guess you can tell by the fact that I have so many different posts showing Iridescent Ice projects. 

And yes, you will need a heat gun to use Iridescent Ice.  But just check out all the other cool things you can do with heat embossing.

And have you see projects done with the emboss resist technique?
Cards made with Stampin'UP! stamp set: By the Tide
Card made with Stampin'UP! stamp set: By the TideCard made with Stampin'UP! stamp set: By the TideCard made with Stampin'UP! stamp set: By the Tide
You can get Iridescent Ice and 
all your embossing and stamping supplies 
from my on-line store.

And be sure to check out my Customer Rewards program.  I appreciate your business and this is my way of saying thanks.

Happy Stamping
--Katie
Easy no-hassle shopping 
Order on-line and have your product delivered to your home
  Click HERE to order your Stampin'UP! supplies.  

Saturday, January 19, 2013

Iridescent Butterfly Wings

What do you think of these iridescent butterfly wings?  You may have noticed a couple of other cards posted a few days ago that used this butterfly stamp. Those were designed by other people.  My own Swallowtail Butterfly finally arrived and I've had a chance to play with it myself.

I  love how this turned out - the wings look so sparkly and iridescent, just like a real butterfly.  And it was actually pretty easy to get this look:

  • The background script image (a stamp called En Francais) was stamped in Versamark and heat embossed with clear embossing powder.
  • The Swallowtail Butterfly stamp (new in the Spring Mini Catalog) was heat embossed in black
  • The color (Melon Mambo and Daffodil Delight) was applied to the image with sponges. 
  • Then the entire butterfly area was sponged again in Versamark and heat embossed using Iridescent Ice Embossing Powder.
  • The final step was adding to Jewel Rhinestones for eyes.

I'm loving this look so much 
that I'll be using this card for my 
Thank-yous for January Orders.


Will you be getting one of these Iridescent Butterfly cards in the mail from me?  

Sale-a-bration starts on Tuesday. 

That's your chance to get a FREE item from the Sale-a-bration brochure AND this card from me.

Happy Stamping
--Katie

Saturday, December 15, 2012

Winter Card with Sponged Snowdrifts

Winter card made with Stampin Up stamp set: Confetti
Sponging is such a great technique, and its so easy.  All you need is your ink pads, some scrap paper and some sponges.  Its a perfect way to make mountains, hills and snowdrifts.

Here's how to do the sponging: 
  • Tear the scrap paper to get  a rough edge.  
  • Then lay the scrap paper where you want the snow drift to be.  
  • Ink up the sponge and brush it along the edge of the scrap paper - instant snowdrift.
  • Be sure to scroll to the bottom to see how you can get a set of free ink pads!
stampin'UP stamp set: ConfettiHow do you like the "window" effect on this card? The window opening was cut with the Labels Collection Framelits.    Of course if you don't own a Big Shot (or other die cut machine) you can always hand cut a window.

Those cute tiny little snowflakes are from a stamp set called Confetti.  They're just the right size for this "window". What I did here was emboss the snowflakes in white before I sponged on the sky.

There is sponging on that gorgeous tree too. The tree was embossed with the Fancy Fan embossing folder.  I really like the way it looks like the branches of a Christmas Tree.  I used Lucky Limeade, which is a pretty bright green and then sponged some more green over the texture embossing to make the texture stand out. And of course you can't forget the star on top.  That was punched out of Champagne Glimmer paper.

card made with Stampin Up stamp set: Winter MemoriesThe sentiment just seemed to fit the card.  Yes I mean the size space that was left for it.  But also the idea - cold outside, warm feeling inside.  The words "Warm Winter Wishes" are part of a stamp set called Winter Memories.  

I've used the Winter Memories Set a lot too. Its especially great if you are someone who likes to color.  Check out this card with the sled.

And even if you don't like to color you can make some great looking projects with a minimal amount of color, like on this card with the ice skates.

Speaking of color, we're down to the final 2 days of the INK-redible ink pad offer. When you buy the Starter Kit, along with all the other great things you'll get (like a 20% discount on future purchases and access to exclusive websites) you'll also get your choice of a FULL SET of ink pads for FREE (your choice of either the Brights, the Regals or the Subtles).  You can read more about this offer HERE, - or contact me by email (or phone 608-220-3450) for more details.  But you really can't wait on this because the offer is only good through tomorrow.

Happy Stamping
--Katie

FINAL 2 DAYS   - -  GET YOUR FREE INK PADS NOW!


Wednesday, December 12, 2012

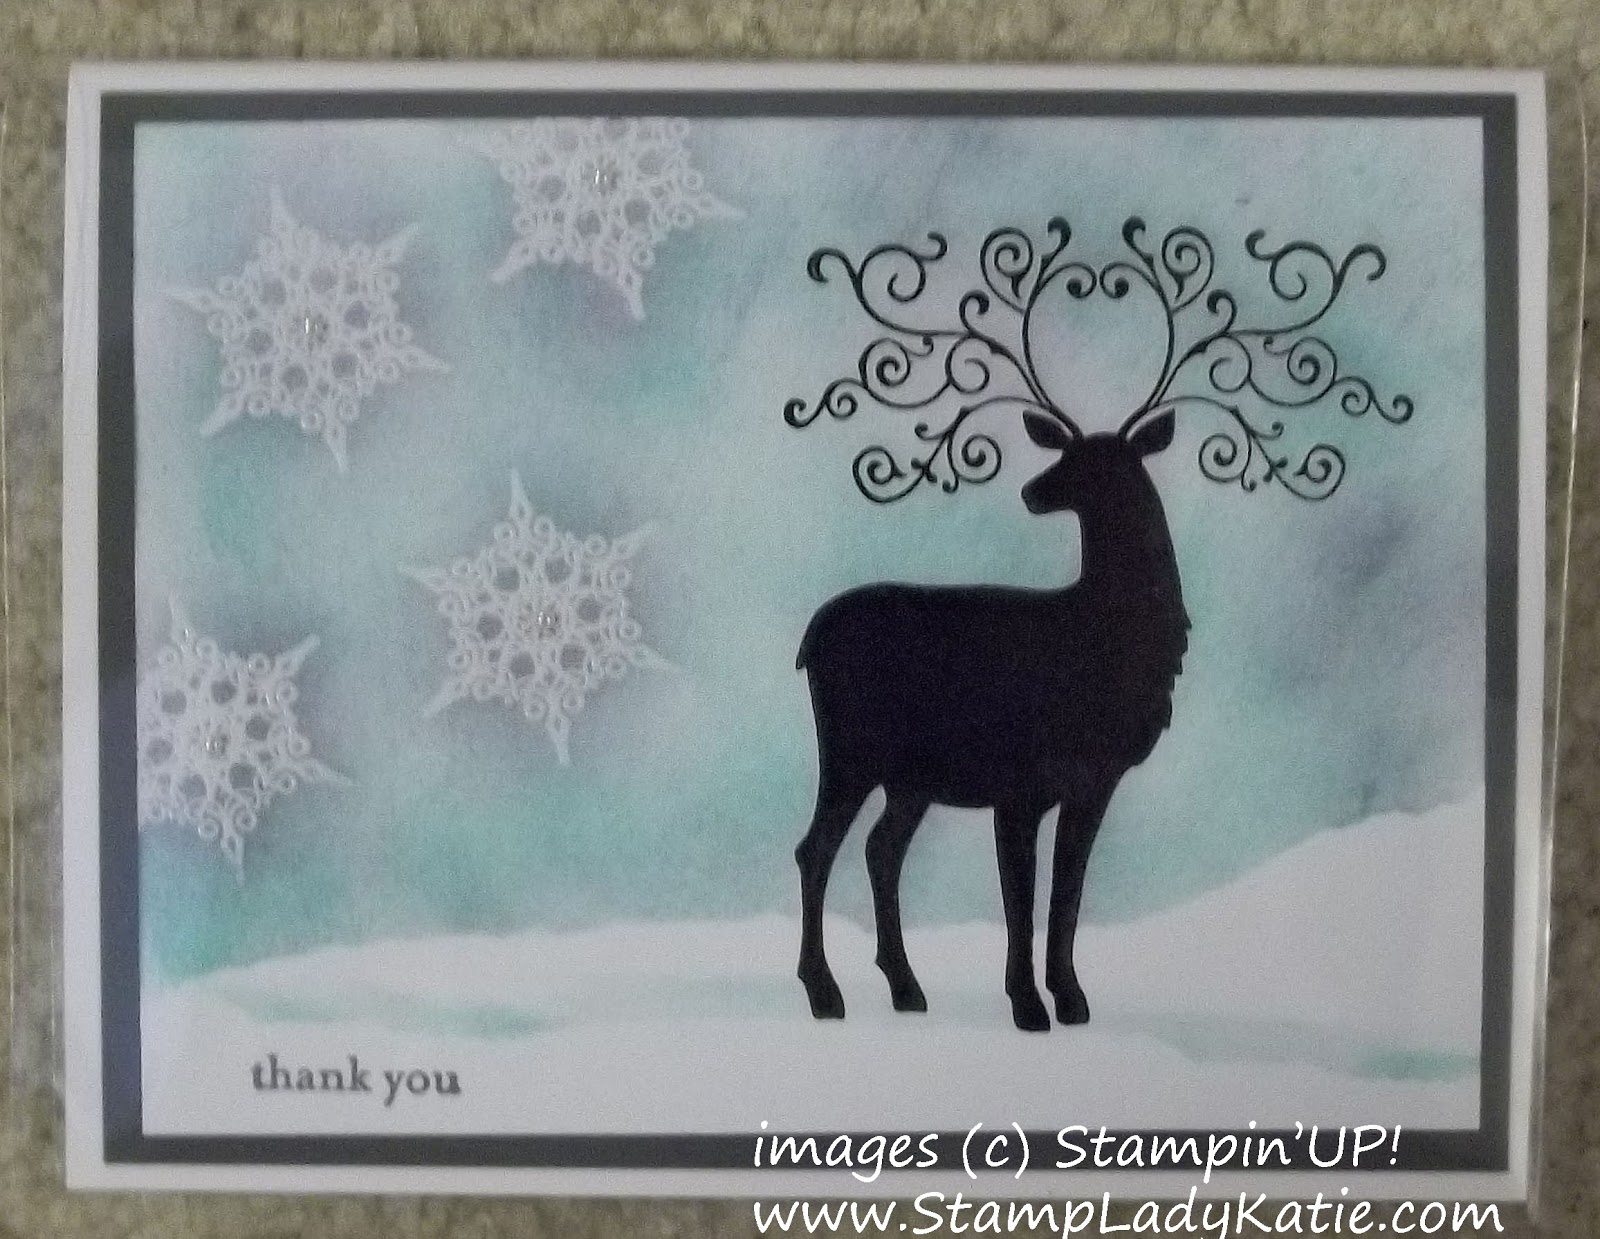
Sponged Winter Landscape for a Christmas Deer

Sponged Snowdrifts and Christmas Deer.We finally got a little snow so at least our landscape now looks like what I remember for a Wisconsin winter.  Although we have just a dusting, not nearly the drifts you see on this card.

This handsome fellow is from a new set called Christmas Deer.  The set is in the Main Catalog and includes lots of little things that could be used to decorate his antlers.  


I designed this card  for a technique class on sponged landscapes.  As a bonus technique, the card also uses an emboss resist technique.  
    StampinUP! stamp set: Christmas Deer
  • The snowflakes and the deer are both embossed.  The Deer was stamped with black craft ink and the snowflakes were stamped with white craft ink.  Both were embossed with clear embossing powder.
  • Tear or cut a curve shape from scratch paper to use as a mask for the snowline.  
  • Sponge color above the mask for the sky.  I used Pool Party and Wisteria Wonder.
  • Move the mask down a little to get a second snowdrift
StampinUP! stamp set: Snowflake SoireeThe sentiment for this card had to be small.  The scene was so gorgeous that I didn't want to compete with the landscape by using anything too big.  This little sentiment from Teeny Tiny Wishes is just perfect for the corner.  

The snowflakes are from a set called Snowflake Soiree. The final touch is a tiny pearl in the center of each snowflake. The snowflake set is in the Holiday Mini Catalog. People often ask me what basic kinds of stamps they should have.  Living in an area where we get snow I always say a good snowflake set should be one of your sets.

December is the last month to get things from the Holiday Mini so if there's something in there that you've been hesitating over, now is the time to get it.

Happy Stamping
--Katie

ONLY 4 DAYS LEFT TO GET YOUR FREE INK PADS!


Monday, December 10, 2012

Sponged Silhouette

Here is an easy way to do a silhouette.  The birds are punched from black paper using the Bird Builder Punch. They are adhered directly to the card. This is a regular size card (5.5" x 4.25") and there really is not room for 3 full size birds so the one on the left is only a partial bird.

The background was sponged on: Old Olive on the bottom, So Saffron, Calypso and Tangerine on top. I really like the look of the green on this card, it reminds me of low growing bushes. I love the birds silhouetted against this sponged landscape.

The sentiment fits so nicely in the narrow empty space at the bottom of the card. That sentiment is from a set called Curly Cute.

Sponges are a great way to apply color. And they're inexpensive too. You get 3 to a pack and I always cut my sponges into 6 wedges.  So I'm really getting 18 per pack. Plus I save them.  I staple a piece of the matching color paper to each sponge so I know what color its been used with. I have sponges that I've been using for 5 years now and they still work great!

This card was part of a group of cards we did for this month's technique: Sponged Landscapes.  Check back over the next several days to see other cards with sponged landscape backgrounds.  A few have green foliage like this one. Others have a snow drift base. And hey, we just got some snow. Finally. Southern Wisconsin is supposed to have snow in December!

Get your sponges and all your Stampin'UP! supplies at my on-line store.

Happy Stamping
--Katie

ONLY 6 DAYS LEFT TO GET YOUR FREE INK PADS!


Monday, November 26, 2012

Come to Bethlehem

Card made with Stampin'UP!'s stamp set: Come to Bethlehem
Christmas in Desert colors!  I really like the soft look of this color combination:  Baja Breeze and Crumb Cake.  

The stamp set is Come to Bethlehem and is one of the sets on sale during the 10-day Holiday Extravaganza Sale.  Check the sale flyer here to see what might be on your wish list.  Some of the items are 50% off, including this stamp set.

To get this look you'll be sponging on the color. So to avoid smearing the stamped image it should be heat embossed.  Stazon ink is great when you are coloring with markers, but it won't stand up to a sponge. Oh, and I always cut my sponges into sections for easier handling.

And here's a tip, when I emboss in black I use Black Craft ink and Clear embossing powder. That avoids any little stray black speckles where the black powder landed on my project and didn't get brushed off.

Remember to check the sale flyer. The sale ends Wednesday.

If you are placing an order be sure to
  1. Check the Holiday Extravaganza Sales Flyer for 20-50% off from now through Nov 28th
  2. Also check the Clearance Rack for additional savings
  3. And remember that all orders over $25 earn Customer Rewards

Happy Stamping
--Katie


Sunday, November 4, 2012

Distressed Leaves for Fall

Fall card made with distressed die cut leaves and champagne glimmer paper.
The distressed leaves on this card are perfect for fall.  This was our technique example last month: distressing techniques. Each month we learn a new technique and add a sample to our growing technique ring. If you are local to the Madison/Dane county area then please join us. You'll find the events calendar HERE and you can RSVP right from this site.

Just look at those leaf layers.  This turned out to be one of my favorite cards. There was a little effort involved but boy, don't you think it just turned out stunning!  Of course the glimmer paper caps on the mushrooms really helps.

To start this card you'll need to pick your designer paper.  Once the paper is chosen then pick solid colors for the leaves that will coordinate with the designer paper. I really love our new leaf die because it has an acorn as well as the beautiful leaves.


2-Step distressing:  The photo to the right above probably explains it all, but here it is in words.
(1) After die cutting the shape we crumpled the leaf to get lots of wrinkles.
(2) Then we sponged brown ink (Chocolate Chip) over the wrinkles and along the edges of the leaf ... Voila! Distressed.

To do this you'll need sponges.  I confess I tried a kitchen sponge but it just doesn't work. Its too stiff.  Stampin'UP!'s art sponges are perfect. They come 3 to a pack and we always cut each one into 6 pieces like you see in the photo above so we get 18 sponge wedges from 1 pack.

STAMPING TIP:  Staple a piece of paper to the sponge wedge that matches the ink color. Then save them for next time with no guessing about which color is on the sponge!

Here's another tip regarding adhesives.
  • Our regular double-sided tape was fine for the backs of the leaves.
  • I used Glue Dots under the acorns because they were smaller.
  • You MUST use a glue dot on the top of glimmer paper. Tape will not adhere well to the glimmer paper because its surface is not flat.
A few more project details
I love how the Stampin'UP! product is all color coordinated.  The fact that the inks, papers and embellishments are all color-coordinated is one of the strongest selling features for choosing Stampin'UP! product.  That and of course the great quality and the super imagery.

So, wouldn't it be great to have all the colors!  Well from now until Dec 16th you have a great opportunity to add to your collection of ink pads.

You get 10 FREE ink pads when you
  • buy the Starter Kit -or-
  • Host a $450 party
You could even collect orders from friends and family and put in your own order online for $450 to earn the FREE ink pads.  Just be sure to use these special product codes, otherwise you'd be charged regular price for the pads.
  • 132652 Brights Classic Stampin' Pads
  • 132653 Subtles Classic Stampin' Pads
  • 132654 Regals Classic Stampin' Pads 
Do you want them?  What should you do now to make sure you get them? Well, this offer is only available until Dec 16. But that is plenty of time.  Here are 3 different ways to get those free ink pads.
  1. Get your calendar, pick a date and start planning your party. Call me to reserve your date. 608-220-3450
  2. Show all your friends your catalogs and start collecting orders yourself to get to that $450 mark I can place that order for you or you can place it yourself online here
  3. Join Stampin'UP! for only $99. 
→ And you could get 2 free sets by Joining First
and then hosting your own qualifying  party. 
←

Happy Stamping
--Katie

Friday, October 19, 2012

Watercolor Winter Christmas Card

Do you send handmade Christmas Cards?  This was my trade card for a recent demo trade.  Its is also one of the cards we'll be doing at the Christmas Stamp Camp.  Its made with one of my favorite stamp sets in the new Holiday Mini catalog -  Watercolor Winter.

I love how this card turned out.  The holly leaves were heat embossed in black and then the whole corner of the card was sponged lightly in green.  Then I went back and darkened in the leaves with a green marker.  The berries were filled in with sparkly red glitter glue - Stampin'UP!'s Cherry Cobbler Dazzling Details.  The flower was stamped on red paper and heat embossed in black and then cut out with a scissors and raised up on Dimensionals.

I made 30 of these as trade cards and they were fairly easy to mass produced.  I cut the flowers while watching TV.  

The greeting is from a stamp set called: More Merry Messages. I really like how the style of the writing seems to match the style of the drawing.  Everything Stampin'UP! does matches so well.

If you are local (Madison Wisconsin area) why not join us for the Christmas Stamp Camp.  There are 4 sessions available, Wednesday EVENING, Thursday MORNING, Thursday EVENING and Sunday AFTERNOON.  Check the events calendar for a time that fits your schedule. Each session will be limited to 10 participants so register now to hold your spot.  Bring your own adhesive and bring a camera if you'd like to take photos of the displays.  And feel free to invite a friend to come with you. Part of the fun of stamping is when we share our creativity with others.

Happy Stamping
--Katie (the new grandma!)

QUICK LINKS: