Showing posts with label Scraps and ReCycled Materials. Show all posts

Wednesday, January 27, 2016

Table Decoration: Recycled Bottle to a Vase


Up-cycling: Glass Beer or soda bottle recycled into a vase 

Don't throw away empty beer and soda bottles! 
 You can recycle them into a pretty vase like this.


Painting the bottles: I started with empty glass bottles and spray painted them white with rustoleum spray paint.  Here are a few cautions:
  • Look for smooth bottles - I rejected the bottles with raised areas with words or images 
  • A few brands had some weird painted numbers that bled through every coat of paint - grr! rejected them too
  • spray in many  light coats, I ended up with 3-4 coats on each bottle.  If you go too  heavy in a single coat it runs
  • work in a well ventilated area BECAUSE with a few bottles I found I had too much paint spray in the air and the paint particles dried mid air and landed on the bottles giving them a very grainy texture. Had to reject a bunch for that reason.

Up-cycling: Glass Beer or soda bottle recycled into a vase 
Decorating the bottle vase: I just love Stampin'UP!'s glimmer papers.  They're a really nice quality and such pretty colors. I used Blushing Bride on this bottle, but with Valentine's Day coming up it would look stunning in red glimmer paper too! Or maybe for a wedding, spray the bottles black and cut the roses from white glimmer paper? Suddenly I'm thinking of lots of variations here.

First step is to get the roses glued on.  The glue tends to slip a bit on the bottle surface, so if you try this yourself go slowly with this step. Be patient and wait for the glue to dry a bit. The glimmer paper is good quality stuff with a firm backing, but that also makes it want to resist the curve of the bottle so you'll have to hold it on til the glue sets. Which is why I recommend the Liquid Tombo, you can control it to get a thin bead on the die cut rose and it sets fairly quickly.

For the Neck I used some jute rope (left over from making a cat tower - the cats love it BTW) and  I used a hot glue gun to hold that in place

Stampin'UP!'s Linen Thread was a perfect match for tying on the tag. The little hearts at the ends of the thread were adhered with glue dots.

What do you think?  Have I inspired you to raid the recycle bin for some old bottles and do a little up-cycling?  They  make a very pretty vase or table decoration - - pretty enough to give as a gift!

Here are the Stampin'UP! supplies if you're inspired to try this project:

103683s
[103683]
$5.25


Thanks for Stopping by: Take a minute and browse previous posts. If you see anything you like I'm happy to help you get the product or just to consult and explain further how the project was made . . . its all about having fun with our hobby.


* * * View Available Product* * *
Click here to see whats on Stampin'UP!'s Clearance Rack
Up to 80% Savings  Clearance Rack Items
click here to see Stampin'UP!'s Deal of the Week
the Weekly Deals
new product each Tuesday

Stampin'UP!'s Annual Catalog
2015-2016
Annual Catalog
Stampin'UP!'s Spring 2016 Occasions Catalog and Sale-a-bration Brochure
2016 Occasions Catalog 
Sale-a-bration Brochure


* * * Buy it Here * * *
Order Stampin'UP! products hereI'll be happy to help you place your order 
Order Stampin'UP! products hereIf you're ordering on-line then use this Hostess Code 
 to be registered for my Customer Rewards Program
T66QWZXR
(good thru - Jan 31st)
Sign-up for Stampin'UP!'s Monthly Craft Kit, the kits are called Paper Pumpkins (but they don't make pumpkins)
Subscribe to "Paper Pumpkin" - a monthly craft kit
  • Sign-up HERE (only $19.95/month)
  • Your card is charged on the 10th of the month
  • Your kit ships around the 15th.
  • You can suspend the subscription in a busy month
  • No minimum commitment, you can quit anytime.

Friday, November 15, 2013

Pennant Punch Designer Paper Christmas Tree

Christmas Card made with Stampin'UP!'s Pennant Punch and Designer PaperHow's your supply of Designer Paper?  If you're like me you probably have a few scraps laying around, right? Just a few?  Well here's a cute way to use them up making this cute Christmas tree.  

And the great thing about this project is that if you are mass producing Christmas cards they don't all have to look exactly the same. So pull out a pile of scraps and start making a bunch of cute cards.

Card Details:
Stampin'UP! pad of Holiday Paper - Season of Style
This is a great way to use up scraps. But what if you just really like these papers and want all your holiday cards to look the same? Stampin'UP! has you covered there. These papers are from a pack called Season of Style. The designs are sold in the regular $10.95 12x12 packs like all our other papers. 

But now, especially for card makers, we're carrying pads of 4 designs in a smaller 4-1/2" x 6-1/2" size for only $6.95.  And with 48 double-sided sheets in a pack you can mass produce a lot of Christmas Cards.

This card goes together pretty quickly and using the Pennant Punch lets you make lots of the triangles very quickly.

If you like the ease of mass producing with punched pieces then check out these past posts showing other ways to use Stampin'UP!'s Pennant Punch to make Christmas Cards.
Holiday Card Christmas Trees made with Stampin'UP!'s Pennant Punch
Holiday Card Christmas Angel made with Stampin'UP!'s Pennant Punch


.

Wednesday, September 25, 2013

Cute Butterfly Table Favor or 3D Desk Gift for a Co-Worker

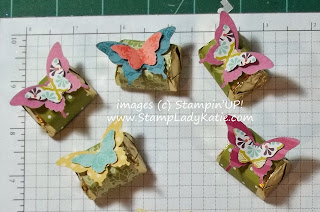
Candy treats decorated with Stampin'UP! butterfly punchesHere's one more way to use your butterfly punches. Decorate a piece of chocolate.  And its a great way to use up scraps of Designer papers.

**This is a QUICK, EASY table decoration.
**Or it's a cute little treat for a
   co-worker's desk.  

This is super easy to do.
**cut a piece of Designer Printed Paper into
    a 1" x 3" strip
**Punch the butterflies and adhere the parts

butterfly punch - add dimension by bending up the wings  use glue dots to adhere small punched pieces like this butterfly


comparison of Stampin'UP!'s 2 butterfly punchesA few tips:
**Add a little dimension to the project by bending up the butterfly wings
**Glue dots are the perfect adhesive. They're strong and small enough to fit the body of the butterfly.


Do you have butterfly punches that would work?  Stampin'UP! sells 2 gorgeous punches: The Bitty Butterfly Punch and the Elegant Butterfly Punch


Save 15% on Stampin'up!'s the Butterfly stamp set and Bitty Butterfly punch 

Did you know that Stampin'UP! also sells stamp sets to coordinate with many of the punches. Through the end of September you can SAVE 15% when you buy both the Bitty Butterfly Punch and the matching Butterfly Papillon Potpourri Stamp Set  wood mount. or clear mount
Save 15% on Stampin'up!'s Butterfly stamp set and Bitty Butterfly punch

How would you use these candy treats?  Wouldn't these chocolate butterfly treats look cute on a table for a bridal shower or little girl's birthday party?  How about teacher appreciation gifts?  Or just a little gift left on a co-worker's desk.  They're fun and easy to make - and hey - its an excuse to buy chocolate! That works for me.

Order your butterfly bundle HERE
Order Stampin'UP! product here


Stop back later for photos of the cards from our Christmas Stamp Camp last weekend.

Thanks for stopping by

Tuesday, August 13, 2013

July Card Class Samples

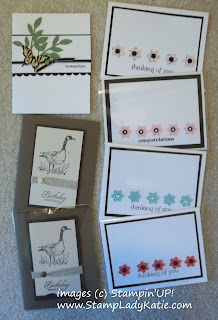
Cards made at the July Senior Center Classes
My goodness I'm behind.  Today I am getting ready for the August Events in Oregon, Monona and Verona and I realized I'd never posted the cards from July.  So here they are: the 3 cards we made at the July Senior Center Class.

The Technique of the Month was using Designer Papers to color an image.  The card in the upper left was our sample card.  You can see an explanation of coloring with DSP HERE.

The card on the right was intended to show a quick simple way to use DSP scraps. If you're like me you probably have lots of little pieces of Designer Papers that are just too pretty to throw away. A small flower punch and a few rhinestones and voila.

Its so fun doing these classes.  I love teaching the techniques and tricks. And of course, I love the opportunity to play with lots of different stamp sets. And I especially love being a part of each of the groups.  The people who attend these classes are a super friendly, talented group. They welcome new stampers and share ideas with each other.

You are welcome to join us at any of our events.  The same event repeats at each of the centers so if you miss one date/location you can always catch up by attending at a different location.  

Check the events calendar HERE.
And you can RSVP here too. We stamp:
**the 2nd Wednesday of the month in Oregon, starting at 9am
**The 3rd Thursday of the month in Monona starting at 1pm
**And the Verona group is just starting, we don't yet have a permanent calendar slot, but our events are posted
.

If you're local I'd love to meet you - and you'd meet some great people too.

Thursday, March 14, 2013

Patterns with Patterned Occasions

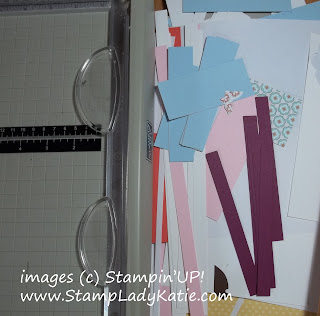
Scraps of paper  What does your scrap pile look like?  Or do you clean up after every project?  I tend to accumulate a "small" pile of scraps by my big paper cutter.

And if you're like me you just hate to throw away something that you could, maybe, use.  

Here's what can happen when you use some of those scraps.  This is how my scrap pile looked recently.  Rich Razzleberry is one of my favorite colors so I decided to make use of every little scrap.  

Then the question was:
horizontal or vertical?
  It was hard to decide - so I did both.

And the end result both ways was a really super simple card. Which one do you like better?  Leave a comment below.


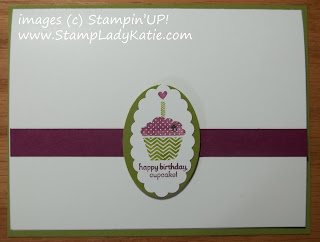
Card made with Stampin"UP! Sale-a-bration stamp set: Patterned Occasions Card made with Stampin"UP! Sale-a-bration stamp set: Patterned Occasions


Stampin"UP! Sale-a-bration stamp set: Patterned Occasions 
The images are from one of the Sale-a-bration stamp sets: called Patterned Occasions.  This set is one of your choices with a Sale-a-bration order.

Sale-a-bration ends March 22
Only 9 days left to take advantage 
of this once a year event.

More tomorrow on this little experiment using scraps.

Thanks for stopping by
Happy Stamping
--Katie


Friday, March 16, 2012

Re-cycling Buttons

Card Made with Stampin'UP!'s Blossom Punch and Stripes Embossing Folder - by StampLadyKatieWhat do you do with old clothes? You know, the ones with too many holes to go into the Goodwill Box. My box of rags is well stocked - and besides, some fabric just does not make a good dust rag. One idea is to make them into a rag rug. Another idea is to use them in the garden to tie plants to stakes. We also use little strips of cloth to mark the electric fence for the animals.

Of course you have to take off the buttons and zippers for these uses. I donate the zippers to a local high school home ec teacher but I keep the buttons and use them on cards. At first glance these cards may all look the same, but on closer inspection you'll see they all have different buttons.

These cards were my latest batch of thank-you notes for people who placed orders at the early March events. I wanted to showcase product that people had bought from me - to help them see additional ways to use their new stuff.  Specifically I wanted to showcase embossing folders and the new Blossom Punch.

Card details:
*The card face was embossed with the Stripes embossing folder
*Then a piece was punched out using the Blossom Punch
*That piece with the hole in it was laid over a piece of Designer Paper and mounted on a card base.
*The sentiment is from a set called Thank-You Kindly
*The sentiment layers were punched with the Scallop Oval punch and  Extra-Large Oval Punch
*The two extra flower were punched with the Boho Blossom Punch
*Colors: Calypso Coral and Pear Pizzazz


Happy Stamping
--Katie