Monday, March 31, 2014

Sympathy Card made with Secret Garden Stamps and Framelits

I got this beautiful sympathy card from a fellow demonstrator - Lori Verdon. She did several things that make this card ideal for a sympathy card: the line of images flowing from corner to corner  - and - the single flower stamped in a lighter color.

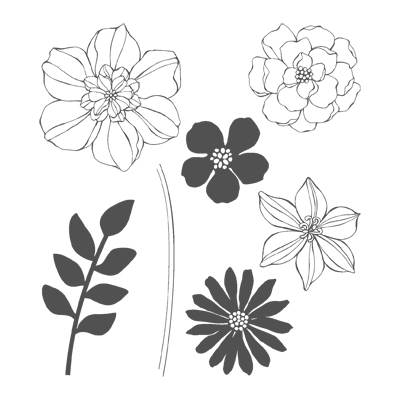
Sympathy card made with Stampin'UP!'s Secret Garden stamp set

Lori chose perfect colors for a sympathy card, Crumb Cake and Early Espresso. This neutral palette sets an appropriate tone for the occasion. These gorgeous flower images are from a stamp set called Secret Garden. But the choice of neutral colors allows the focus to be on the sentiment.
Stampin'UP!'s Secret Garden  stamp set

Did you notice the raised flower? One thing I so appreciate about Stampin'UP! is the matched sets of stamps and dies. Lori could have "fussy cut" the flowers. But why bother when there's a set of matching framelits to make life easy! 

Here are a couple of other projects made with the Secret Garden stamps and Framelits.
Card made with StampinUP's Secret Garden stamps and framelit dies
This flower looks so delicate when stamped in white on pink paper. 
And what a time-saver to be able to die cut the image instead of fussy cutting!

Do you agree that those die cut leaves look great even without stamping an image.

Scrapbook baby page made with StampinUP's Secret Garden Stamps and framelit dies

The Secret Garden Stamp set - wood mount or clear mount 
are available from my on-line store.
Order yours today and qualify for Customer Rewards Points.

Thanks for stopping by, I hope you've been inspired
 

QUICK LINKS:
  • Special Savings: Deal of the Week  . . . Click here to see The Deal of the Week 
    - New items post each Tuesday

Saturday, March 22, 2014

Easy Candy Treat Holder

Here's an easy candy treat holder. 
Super cute and so easy to make a bunch.

Candy Treat Holder made with Stampin'UP! punches including the new Scallop Tag Topper Punch.

The simple little "hello" is from the stamp set: A Dozen Thoughts
 I stamped it off-center so there'd be room for the 1/2" circle with the rhinestone.

Projects like this go together so nicely when you have matching punches 

Matching colors is nice too!
The Rich Razzleberry is so pretty with the Pink Pirouette.

Candy Treat Holder made with Stampin'UP! punches including the new Scallop Tag Topper Punch.
Step 1 to make this, start with a strip of paper 2" by 5-1/2". I laid the candy in the center of the strip and scored on either side to get a crisp fold. Having a paper trimmer with a scoring blade makes it quick and easy to cut and score in a single step.

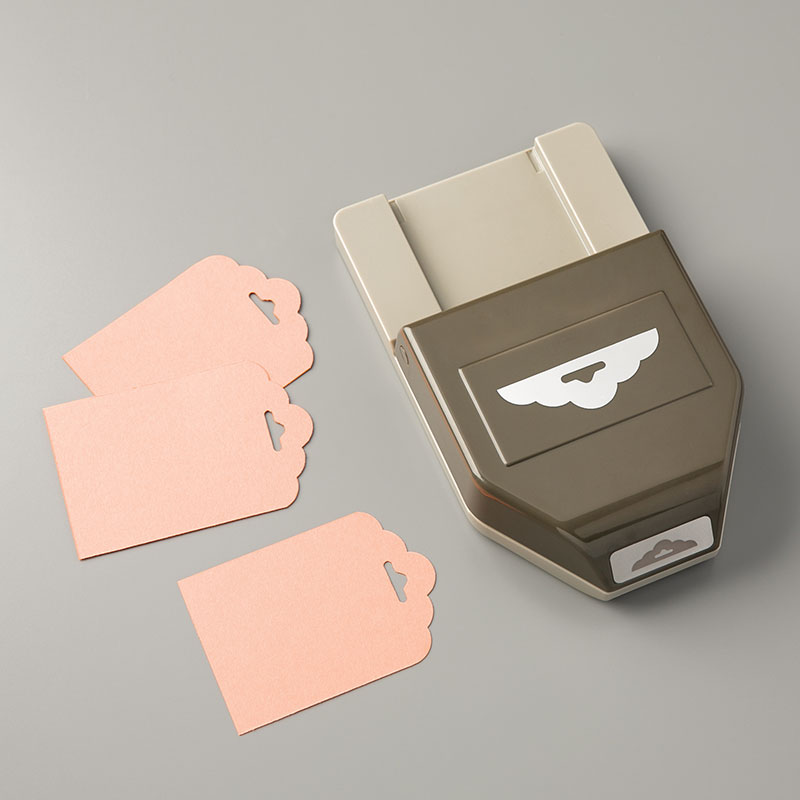
Stampin'UP! 's new Scallop Tag Topper Punch.
Step 2 is to make a decorative end. I used the new Scallop Tag Punch. Then just cut in half way from opposite sides on each end. Then slip the 2 notched ends together to make a clasp.

HINT: Use Red Sticky Strip to hold the candy in so it won't fall out


Thanks for stopping by, I hope you've been inspired
 

QUICK LINKS:
  • Special Savings: Deal of the Week  . . . Click here to see The Deal of the Week 
    - New items post each Tuesday

Sunday, March 16, 2014

Punch Art Vase

This punch art vase was made using Stampin'UP!'s Ornament Punch (item #13252). 

Get Well card with a Punch Art Vase made with Stampin'UP!'s Ornament Punch


Here are 2 more punch art vase cards from earlier posts - click on the picture to see the original post about each card. These punch art vases are both made with the old (retired) ornament punch. Its very similar to our new ornament punch. When you cut off the bottom the ornament makes a gorgeous vase. I actually like the shape of the new ornament punch better for a vase. It looks more like the shape of a flower pot.

Card with a Punch Art Vase made with Stampin'UP!'s Ornament Punch 

Vases come in many shapes and sizes. Likewise when you make a punch art vase you have many shapes to choose from.  A vase simply needs a flat bottom. You can try this with circles or ovals too.
Ideas for a Punch Art Vase

The color on the last sample is from Designer Print Paper.

If you're inspired to try some punch art 
be sure to check out all the great punches Stampin'UP! has to offer.
See the punches HERE in my on-line store.

And if you order more than $50 worth of Stampin'UP! product before March 31st
you can get that gorgeous designer print paper for as your FREE Sale-a-bration item.
Read more about Sale-a-bration HERE.


Thanks for stopping by, I hope you've been inspired
 

QUICK LINKS:


Thursday, March 13, 2014

How to Add Color to Texture Embossing

Yesterday's post focused on Texture Embossing  . . . Why? because there are 3 embossing folders on sale this week. Check out the weekly deals HERE.

Today I'm sharing
a trick you can do with embossing folders.
Use your embossing folders 
to add color!

Use a brayer or a sponge to
add ink to the folder before you emboss.

If you look closely you'll see that the colored part of this card is the "de-bossed" section - the depressed part of the card.

You'll get a different look if you brayer over the "embossed" card, the raised area of the card.


By the way, my inspiration for this card was our convention bag from 2012.  See the original blog post HERE.

Conventions are so much fun. 
  • You meet great people 
  • and learn about new product. 
  • There are thousands of samples to look at. 
  • We get a free convention bag
  • Our admission includes several stamp sets
  • and there are lots of give away prizes.
Want to know how 
you can go to convention for FREE?

Everyone who buys the Starter Kit from October of last year through June of this year will get a free admission to convention. Will you be one of the lucky ones?

There are 2 reasons people buy the Starter Kit.
  • If you're looking to own your own business this is a really fun way to earn money while setting your own hours.
  • Alternatively you can join Stampin'UP! just to be a Discount Buyer.
Either way, its a great opportunity. And even more so right now, because through the end of Sale-a-bration you can get an additional $25 of free product when you buy the Starter Kit.  

Pay just $99 and choose $150 worth of product 
and a free $250+ convention registration
Contact me for more information
Or click here to join now.

Ready to Join?


Thanks for stopping by, I hope you've been inspired
 

QUICK LINKS:

Wednesday, March 12, 2014

Really Big Deals on Big Shot Accessories this week

Do you check the Weekly Deals?
Each week Stampin'UP! has a weekly sale with 6-8 products.
This week there are some really BIG deals on BIG SHOT Accessories.

Stampin'UP!'s Deal of the Week for March 11, 2014

Are you like me? Do you absolutely LOVE the look of texture embossing? 
Check it out - there are 3 embossing folders on sale this week.

Card that's been texture embossed with Stampin'UP!'s Designer Frames Oval Frame
Here's a sample with the Oval Frame. These frames are such a pretty way to highlight part of a card. Read the original blog post to get more details on this project.

There are lots of ways to use the frames. You can stamp in the frame or add embellishments like here. We used these frames to make place cards for a dinner event to highlight the name of each person.

In addition to the embossing folders, the Deals for this Week also include:
 You can order any of these products on-line HERE and if your order total is over $50 you'll get to choose a FREE item from the Sale-a-bration brochure.

Thanks for stopping by, I hope you've been inspired
 

QUICK LINKS:


Monday, March 10, 2014

Delicate Doilies Wedding Card

wedding card made with Stampin'UP!'s Delicate Doilies stamp set. I really like how this wedding card turned out. When you think about images associated with weddings - lace and doilies come to mind. The lacy doily image on this card is from a stamp set called Delicate Doilies.


Butterflies are also good wedding images. A butterfly goes through an amazing transformation during its life and a wedding is certainly a major transition for the bride and groom.


I love the soft, formal look of this color combination. The black and white gives it the formal look and the pale green Pistachio Pudding accents and Smokey Slate doily add the softness.


Stampin'UP! has a well deserved reputation for coordinating product.  Just look how perfectly these two punched butterflies images look together.  The green (Pistachio) piece was punched with the Elegant Butterfly Punch ( #127526) and the smaller butterfly was punched with the Bitty Butterfly Punch (#129406).

Stampin'UP! coordinates colors as well as shapes. This beautiful Pistacio Pudding 3/8" Ruffled Stretch Trim (#130020) is a perfect match for the Pistachio Pudding paper.

The sentiment is from a set called Teeny Tiny Wishes. The words are punched out using the Word Window Punch (#119857) and layered on a black piece punched with the Modern Label Punch (#119849). Yep! one more example of coordinated product.

Do you like this card, but you're not going to a wedding soon? There are 24 different sentiments in the Teeny Tiny Wishes stamp set. And they all fit nicely with this pair of punches.

You can get these punches, paper and stamps from my on-line store.


Thanks for stopping by, I hope you've been inspired
 

QUICK LINKS:


Tuesday, March 4, 2014

BookMark Card with the Tag Punch

This beautiful flower card does double duty - its a bookmark! 
 
a Bookmark Card made with Stampin'UP! Punches

I used the Modern Label punch to create a "pocket" for the bookmark.
The wide part of this punch is the perfect size for a tag made with the Scallop Tag Punch.
a Bookmark Card made with Stampin'UP! Punches
The Pansy Flower Punch in the dark Rose Red is the perfect layer 
for the Pink Pirouette Petite Petal Punch.
The center of the Rose Red Petite Petal flowers 
was punched with one of the Itty Bitty Shapes punches.

Stampin'UP! has lots of wonderful punches

And Sale-a-bration is the perfect time to invest 
in additional papercrafting tools like these punches.

Sale-a-bration runs through March 31st.
Each $50 you spend during Sale-a-bration
earns you a FREE item from the Sale-a-bration Brochure.

Thanks for stopping by, I hope you've been inspired
 

QUICK LINKS:

Sunday, March 2, 2014

Tea Bag Card

Looking for a cute way to give a little something to a friend or co-worker?  
Here's a cute teabag card. 
Teabag card made with Stampin'UP!'s Tea Party Stamp Set.

It's decorated on the front with images from a stamp set called Tea Party
Available in either wood mount or clear mount.
The Rose Red and Garden Green color combination is so pretty.


Its finished off with a couple of self-stick Rhinestones in the corner
and a cute "belly band" made of Pistachio Pudding 3/8" Ruffle Stretch Trim as a closure.


The Tea Party stamp set has some great images. 
You can use it to make invitations or thank-yous
as well as some really cute hello cards.

Stampin'UP!'s Tea Party Stamp Set.

TIP: You may be wondering how I got these different colors, since the image is a single stamp. The answer is to color the stamp itself with markers and then stamp to the paper.  This is a large image so remember to "HUFF" - exhale on the stamp to re-moisten the ink - just before stamping.


To make this card I cut a 4" strip from a piece of 12x12 cardstock.
Score at 4" from each end.
On the last section cut off a triangle from one corner up to the opposite corner by the score line.
For stability I added a green 4"x4" sheet into the pocket with the teabag.


Thanks for stopping by, I hope you've been inspired
 

QUICK LINKS: