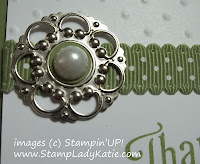
Have you seen the new Builder Brads? Wow! They can really dress up a project. Its such an easy, simple little addition to a project
- the fancy metalwork adds elegance
- and you can custom design the center.
The middle part of the brad is a flat, 3/8" circle. Add a punched circle of matching card stock or designer paper and you have a well put-together project. Top it off with an epoxy dome, which is included, and you have a gorgeous embellishment.
This first card has a circle of blue paper to match the ribbon, ink and card base. The 1" diameter of the Builder Brad layers nicely over the 1/2" width of the ribbon.
The next card has a circle of green cardstock. But on this card the epoxy dome was replaced by a self-stick pearl.
These brads are new with the Spring Mini Catalog. You've seen them twice already on this blog,
- Once in January when they were used as earmuffs for a 3D snowman project
- And just recently with "ribbon tails". Here is a close-up of the ribbon tails and you can see the full card here.

They are super easy to use. You can probably figure it out just by looking at this photo. But if you want to see a quick video showing how easy it is then check out this video.
You can get these brads and all your Stampin'UP! product in my on-line store.
And be sure to check out my Customer Loyalty Program. I appreciate your business and reward you for it.
Thanks for stopping by
Happy Stamping
--Katie
|


No comments:
Post a Comment