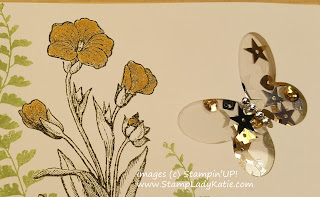
If you're thinking of trying a shaker card I have a few suggestions.
First thing to think about is placement of the images. On this card I stamped the sentiment first and then diecut the shape. You can stamp the rest of the imagery around the sentiment and the hole.
Second: regarding order of operations.
- Decorate the front first - because it will be "lumpy" and impossible to stamp on after you've created the shaker part.
- Remember to adhere the window sheet to the back side of the hole BEFORE you line it with dimensionals - OK I confess, I've done that and you feel really dumb as you're ripping off the dimensionals.
- create your "well" for the shaker elements (sequins on this card) but fill it BEFORE you remove the sticky backing
- Use a separate sheet of paper over the hole to close it. Then attach it to the base.
These are the products I used on the Butterfly Shaker Card
And here's another view of the shaker window itself.
Here are two more shaker cards from previous posts. Click on an image below to see more instructions and additional photos showing how to make shaker cards.

Medal Shaker Card
Thanks for Stopping by: Take a minute and browse previous posts. If you see anything you like I'm happy to
help you get the product or just to consult and explain further how the
project was made . . . its all about having fun with our
hobby.


1 comment:
What great shaker cards Katie. I really like the first one with the Butterfly Basics. It's so feminine and sweet. Thanks for sharing.
Post a Comment