The stamps on this card are from the October Paper Pumpkin Kit: Blissful Bouquet. I'd posted this card a few days ago when I showed a whole bunch of alternate ideas for using the Blissful Bouquet stamps.
Since then I've received several questions about how I made the wreath so I thought I'd explain here. The key is that photopolymer stamps are somewhat flexible. So even though the leaf frond is more or less straight, due to the flexibility of the photopolymer you can add even more of a curve when you mount it on the block.
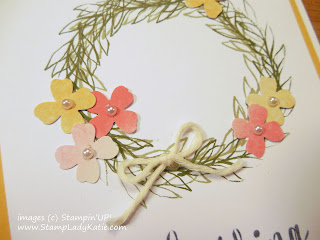
The other trick is to use a guide for the circle. I punched a circle and laid it on my project. Then I stamped a single row of fronds around the circle. When I removed the circle it was easy to stamp around the wreath several more layers so the wreath is nice and full.
Here's a close up of the flowers. I guess with flowers that that'd make this a spring wreath, even though its fall here in Wisconsin. While you're looking at the close up, notice the cute little flowers. The small punch used on the flowers is such a pretty shape, its one of my favorites . . . from Stampin'UP!'s Itty Bitty Accents Punch pack (see supply list below)
PS: Do you have your Wish List filled out for Christmas?
Thanks for Stopping by: Take a minute and browse previous posts. If you see anything you like I'm happy to help you get the product or just to consult and explain further how the project was made . . . its all about having fun with our hobby.
* * * View Available Product* * *
| |||
| Up to 80% Savings Clearance Rack Items |
the Weekly Deals new product each Tuesday |
2015-2016 Annual Catalog |
2015 Holiday Catalog |
* * * Buy Here * * *
| |
 | I'll be happy to help you place your order |
 | If you're ordering on-line then use this Hostess Code to be registered for my Customer Rewards Program 79S2B3ZT (good thru - November 15th) |
Subscribe to "Paper Pumpkin" - a monthly craft kit
| |


No comments:
Post a Comment