Saturday, September 29, 2012

Fall Card: Veins on the Die Cut Leaves

Card made with Stampin'UP!'s leaf die and spider web embossing folder.
Here is a gorgeous sparkly fall card.  There's lots of things that make this card special: one thing is the veins on the leaves.  The leaves were cut with the Autumn accents Die. This die can cut multiple pieces of paper at a time - but it doesn't emboss. So how did I get the veins in the leaf?

Here is the trick to getting the veins in the die cut leaf. I used the spider web embossing folder.  Its easy to line up the die cut with the exact right place on the the folder because the folder is translucent.
Spider web embossing folder used to make veins in a die cut leaf
How about that sparkly leaf? That's the new champagne glimmer paper. It sure does help make this card special. And if you're wondering about colors, the top leaf is Summer Starfruit and the bottom leaf is Old Olive.

The background strip uses the new Core'dinations paper.  The Core'dinations paper is available in 3 colors: green, red and brown. When it gets pressure embossed it breaks the fibers and shows the white paper through.  You could of course, make this with a cute Designer Paper too. 

The final touch on this card is the linen thread and the button. This was so easy to do!  I just put the linen thread through the button and tied the bow. Then adhered it to the card with glue dots.  Man I love glue dots - they're extra sticky and perfect for anything a little bulky.  I always use them on buttons.  And I do confess this is not a Stampin'UP! button.  I like to recycle buttons from old clothes before they hit the rag bin. I've had a bunch of these around for so long I can't even tell you which item they came from.

        Are you ready to stamp some fall cards?

Not counting old re-cycled buttons, you can get all your Stampin'UP! supplies HERE.

I do appreciate your business
Happy Stamping
--Katie

By the way - are you looking to get some nice portraits taken with a beautiful fall backdrop?  Check out Portrait Independence Studios.  They will be taking outdoor portraits at Brigham Park in Mt. Horeb, WI on October 6th.  Contact them for an appointment.  Actually, they'll take your photos any time, but they have a whole day scheduled on the 6th.

QUICK LINKS:

Satin Stitched Ribbon - September Back to Spool Special


Friday, September 28, 2012

I Give you the Sun and the Moon

Have you ever done a little "moonlighting". I don't mean with a job. I mean making a sun or moon on a project. There are a couple of ways to do this.

. . . One way is to Punch a circle out of a Post-a-note and stick that on your project and sponge around it - like on the lion card to the right. My stampers this month used this same technique to make this silhouette card and this polar scene.

Try it, its super easy!


. . . A second way is to punch a circle and sponge color through the hole, like on the the sunrise behind the trees on this card. 

My stampers sponged through a hole to make this stunning scene with birds on a branch.

I wouldn't be so gushing with praise for my own work, but I didn't design the bird card, that was designed by my friend Lori Verdon.  Lori is one of the demonstrators in my local group and she and I have roomed together several times at conventions.  thanks for the inspiration roomie!


OK, so lets get back to you "moonlighting" . . . and this time I do mean in terms of a job!  Being part of a demonstrator group is wonderful in so many ways.  We have fun when we get together but we also are in regular communication via email and private websites.  The support, both business ideas and stamping ideas, is phenomenal. You could join us.

The Starter Kit is an amazing deal by itself - and you can completely customize it, you pay only $99 and you get to choose $125 worth of product.  And there is NO SHIPPING on the Starter Kit.

Buy the kit from me and you are automatically part of our group. I actively support everyone who buys the Starter Kit from me - whether you intend to make this a full time career or if you plan to "moonlight" or just want a discount on your own personal purchases. If I could I'd "give you the sun and the moon".  I meet regularly with the local people and if you are not in southern Wisconsin then we would communicate by phone and email and you'd get access to my private website and have the option to participate in mail-in trades. My next local meeting is this weekend - Sunday Sept 30th.  Contact me if you'd like to come as my guest.

Its also worth mentioning that 2 of the demonstrators above me are very active in their businesses and also hold regular meetings that you'd be invited to attend.  The next large group gathering is October 6th in Madison, Wisconsin.  Again, contact me if you'd like to come as my guest

Call (608-220-3450) or email if you have any questions about buying the Starter Kit 
and what that could mean for you and your stamping.


I hope to see YOU soon
Happy stamping
--Katie

Thursday, September 27, 2012

Coloring with Ribbon!

Wow, the images on this card are colored with ribbon! I got this card from my friend Norma Artman at a demonstrator meeting last night.  I know there have been several versions of this posted in many places on the web, but still . . . I think this is such a creative use of ribbon.  And Norma always does a beautiful job with her work.

It looks stunning - but is actually pretty easy. The holes were cut using Stampin'UP!'s new Holiday Collection Framelits dies.  Then the ribbon was glued to the back side of the card. Voila!


card made with Stampin'UP! Framelits Holiday Collection

And just look at that gorgeous ribbon!  The gingerbread man was colored with Stampin'UP!'s 1/2" Scallop Dots Ribbon (the Chocolate Chip color).The Candy Cane was colored with the 1/4" Stitched Grosgrain Ribbon (stripes of Real Red and Whisper White).  The Christmas Tree was colored with the 3/8" Stitched Satin Ribbon (using Gumball Green).

The ribbon used on the tree is on sale this month. You get a FREE spool of the Stitched Satin Ribbon (normally $8.95) with every $40 purchase.  But you'll have to hurry - this sale ends the end of September.

Did you notice  the "odd" shape in the set of framelits? You can easily recognize the star, mug, tree, gingerbread man and candy cane.  But what the heck is that thing in the middle??!?  AAHH yes, its steam.  "Steam?" you say?  Yeah, steam,  This set of framelits has a matching stamp set and the odd shaped framelit is matched to the steam that would be rising from the mug.  

And great News! Stampin'UP! is now offering product bundles.  You save money when you buy both the framelits and the stamp set.  Buying them individually would get you to the $40 level to earn the free ribbon. But I'm sorry to say that with the savings you get with the bundle that it won't quite reach the $40 mark.  Oh wait . . . thats a good thing!  You were going to spend $40 to get the free ribbon and now you get even more for your $40 - yay! and free ribbon to boot!  click here to shop now or follow the links below to view the catalogs online.  And remember that everyone who purchases on-line from  my website earns more FREE product through my customer rewards program.

I appreciate your business
Happy Stamping
--Katie

Satin Stitched Ribbon - September Back to Spool Special


Tuesday, September 25, 2012

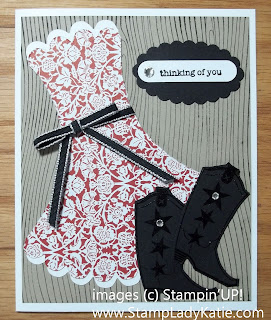
Bootiful Dress Template Card

A Dress Template Card . . . I've been wanting to try one of these for a long time.  And its so simple really.

I was also playing with a new stamp set called Bootiful.  This set has 4 different boots in it: the cowboy boots you see here, a gorgeous furry winter boot, a cute garden boot and a wonderful witch's boot.
Dress Template Card made with Stampin'UP! Set: Bootiful.


The boots on this card are black embossed on black paper.  I wanted the stamped stars to really "shine". The self-stick rhinestone helps to bling it up too.  The 1/8" black and white taffeta ribbon also really adds to the whole ensemble. And given the cowgirl theme I decided to use the woodgrain background stamp on Crumb Cake paper.


How to make the dress: just use the Scallop Circle Die. Count over 4 scallops for the bodice and 10 for the skirt hem. I cut out the waist part with a scissors.To help with that you can create a cutting guide by laying a circular object (a coaster in this photo) over the die cut to trace a cutting line. Then comes the hard part – deciding which gorgeous Designer Paper to use! 

If you click on the photo to the right you should be able to see the details a little more clearly.


 Thanks for stopping by.  I hope you are inspired to make some "bootiful" cards of your own.


Satin Stitched Ribbon - September Back to Spool Special

Thanks for stopping by
Happy Stamping
--Katie

Monday, September 24, 2012

Die Cut Leaves with Veins

Card made with leaf dies, Banner Framelits and Stampin'UP! Gently Falling Stamp Set.
The unique thing about today's card is the veins on the leaves. The leaf shapes were cut with Stampin'UP!'s new Autumn Accents Die. This is a Bigz Die so it can cut multiple pieces of paper at a time.  But of course the paper it cuts is flat - no veins in the leaf.


Spider Web embossing folder makes veins in a leaf.
So, how DO you get the veins in the leaf? Well here's a little trick - use the Spider Web Embossing folder.  The folder is translucent so its easy to see to line up the cut leaf shape with the lines on the folder.  Don't you just love getting extra use from a product!

Other Details: The leaf images on this card are from a stamp set called Gently Falling and the colors are Gumball Green, Summer Starfruit and Cherry Cobbler.
Stampin'UP! Gently Falling Stamp Set Stampin'UP! Itty Bitty Banners Stamp Set

Satin Stitched Ribbon - September Back to Spool special

You could easily turn this card into a Thanksgiving Card - or any other event. The sentiment I used is from a set called Itty Bitty Banners. I could have cut the banner by hand, but this is another one of Stampin'UP!'s matched sets (a set that matches a die or a punch. In this case the stamp set goes with the Bitty Banners Framelits.  The framelits can of course be used with any thing that fits inside them.


The ribbon is the Satin Stitched ribbon that is part of the Back to Spool special for September.  You get a FREE spool of this ribbon with every $40 purchase this month.  For this card I just tied a knot in the ribbon and then threaded the two ends through 2 holes in the button and glued it to the card.


Satin Stitched Ribbon - September Back to Spool Special

Thanks for stopping by
Happy Stamping
--Katie


Sunday, September 23, 2012

French Foliage for Fall

Card made with Stampin'UP! set: French Foliage
Its mid-September and definitely starting to look like fall. Some of our trees are beginning to show a little color and I think that's what inspired this card. Being inspired by the foliage outside it seemed only appropriate to use the stamp set: French Foliage.

The background color is Summer Starfruit. Its sort of a mix between yellow and green, but its perfect for leaves that are starting to change with the fall. Just right for this foliage. In case you are wondering the button is recycled from some old clothes and its an amazing color match.

For leaf sets, French Foliage is my all-time favorite. OK, yes, its true, I just love leaf sets. But really, this one is great.  Just look at what comes with it. The little bit of script and the splotchy stamp.  You can make some totally amazing cards with this set.


Other Project Details:
Stamps:  French Foliage and Sweet Essentials
Accessories:  Linen Thread, Designer Frames Embossing Folder.


Thanks for stopping by
Happy Stamping
--Katie

Saturday, September 22, 2012

Serene Silhouette Sunset

Card made with Stampin'UP! Serene Silhouettes and a masked sun
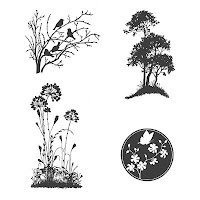
This gorgeous sunset scene was stamped with one of the images from Serene Silhouettes. This stamp set was the first one I ordered from the new catalog.  I just love all the images in it.  I'm a sucker for silhouette cards anyway and this set is just perfect for making silhouettes.  

The image was embossed because we were sponging over it and I didn't want to smear the ink.  After embossing we cut it out with the new Framelits dies.  Then we sponged on the color.

Do you like the "sun" behind the tree?  After we embossed the image we then punched a circle from a post-a-note. We placed the post-a-note where the sun was to be and sponged over it.  The unsponged area became the sun. The technique is just like the moon on the polar bear card.

Using a Post-a-note to Mask a sun or moon
I'd meant to most this photo when I shared the polar bear card and somehow got sidetracked talking about the Iridescent Ice on the snow and the stamp set.  So here it is - it just shows the technique for using a post-a-note to mask when sponging a sky.

Other details of today's card:
stamp set: Serene Silhouettes, Woodgrain Background and Sweet Essentials
Accessories: 1" Square Punch Framelits Labels Collection, Black Ink and clear embossing powder, linen thread and an old button


Thanks for stopping by
Happy Stamping
--Katie


Friday, September 21, 2012

Blossom Flower Punch with a 4 square background

Card made with the Mixed Bunch stamp set and the Blossom Punch
Here is a variation on the 4-square theme.  The background is so simple. Just punch 4 squares and round opposite corners. The 1" square punch makes a decent size square for this template and the corner rounder punch can actually do all 4 squares at the same time (because the Designer paper is thinner than regular cardstock!).

This card is one more sample showcasing a matched punch and stamp set combination.  The flower punch is the Blossom Punch and the stamp set is called Mixed Bunch. It is so convenient to have stamped images that are a perfect fit for my punches. I'm so glad Stampin'UP! does this.

Do you know the secret catalog code?  Stampin'UP! has a "not-so-secret code" they use when printing the catalog to help you know when a stamp set has a matching punch or die. Check out this image from the catalog. 

Stampin Up Catalog image showing the color coding for matching punches and dies. Notice the red line in the image of the Bordering on Romance set. This means there is either a die or a framelit die that goes with this stamp set.

Now notice the blue lines in the image for the Perfect punches stamp set. This means there are punches that match these stamps.

Browse through the catalogs. Check out all the sets designed to go with punches. Stampin'UP! is doing more and more of this. Take some time to look through the Annual Catalog and the Holiday Mini Catalog and see how many matched sets you can find.


Do you need a paper copy of the catalog?  Please contact me and I'll send you one:  608-220-3450.  

Stampin'UP! makes shopping easy too.  Once you've made your shopping list you can place your orders online HERE and have them sent directly to your house.  
  • My Thanks: When you place your orders through me you earn Customer Rewards Points. My way of saying thanks for shopping with me.
  • Stampin'UP! Thanks: This month, when your order totals $40 you will get a free spool of Satin Stitched ribbon from Stampin'UP!. caution: the ordering website may not prompt you to add the ribbon but once your order reaches $40 you can add the ribbon color of your choice and it will appear on the list as free.
Stampin'UP! Back to Spool Ribbon special
Thanks for stopping by -
remember the ribbon special expires the end of this month so start browsing those catalogs now!
Call (608-220-3450) or email with any questions about the ordering process.

Happy Stamping
--Katie

Wednesday, September 19, 2012

Serene Sympathy

Sympathy card made with Stampin'UP! stamp set called Serene Silhouettes.
Today I'm attending the funeral for the husband of a friend. Karen is one of the women in my demonstrator group and we've all been so saddened to watch as her family dealt with this very aggressive cancer.

The imagery on this card really touched my heart - it seemed so perfect for a sympathy card.  The silhouettes as a final image and the idea of the sun setting.  This image is from Stampin'UP!'s stamp set: Serene Silhouettes.

Stampin'UP! Stamp Set: Serene Silhouettes


The words are from a set called Word Play. I liked what the words said, but . . . The image actually ended with a little heart. The heart seemed a little too playful for this occasion so I really didn't want the heart on the card.  To solve that problem I inked the words with a marker and just did not ink the heart.  

Check the image to the right - see how  I markered everything except the heart.


This is actually one of the cards we did this month at the September Stamp-a-Stacks.  We were focusing on the technique of Moonlighting.  OK, a misnomer here because this is a sun, not a moon.  But the idea is to create a sun or moon without using a sun or moon stamp.  In this case the sun was sponged on. The yellow first and then a little orange.

If you've been watching this blog recently then you've seen all three ways we made suns or moons:
1.  a Punch Art Sun
2. A Masked Moon, sponging around mask
3. Negative Masking: sponging inside the circle as on this card.

Sympathy card made with Stampin'UP! stamp set called Serene Silhouettes.
Here's one more idea: The card I made was a vertical card, but it could easily be turned into a horizontal card.

 - be sure to stop back often for
    more ideas and samples.

Sign-UP for my newsletter to receive
   *notification of Stampin'UP! promotions
   *updates to my events calendar
   *exclusive tips and ideas


And if you don't already have
a Stampin'UP! demonstrator
      I'd love to be yours

  • You can get all your Stampin'UP! supplies HERE on my Stampin'UP! website. 
    Shop from your computer and have it delivered to your door.  
  • Need a catalog?  You can view the catalog online or call me (608-220-3450) to get a paper catalog. 
Thanks for stopping by
Happy Stamping
--Katie

Monday, September 17, 2012

Nature's Pace Lay-Out Inspiration

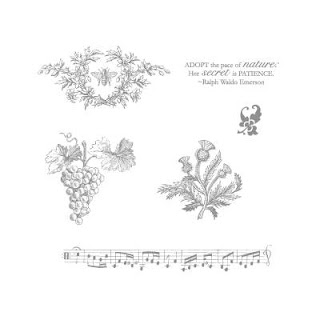
Card made with Stampin' UP! stamp set called: Nature's PacePeople often ask me where I get my card ideas. The answer is that it depends on the project.
  • Sometimes I choose a stamp set and let the card evolve as I build.
  • Other times I find a cute or easy lay-out and search for the right size stamp to use
  • And sometimes I see a gorgeous card someone else has made and I just copy it.  By the way - copying is OK. Its called CASEing.  The acroynym stands for Copy And Share Everything and is considered a form of praise for the original artist.
I designed these cards to demonstrate an idea: how you can adapt one easy lay-out to either a vertical or horizontal format. Stampin'UP'! Nature's Pace was a really good choice for the Stamp set because it has 3 images all similar in size, some vertical and some horizontal.  It really gave my stampers some options for turning their cards into their own unique creations.

Card made with Stampin' UP! stamp set called: Nature's Pace Card made with Stampin' UP! stamp set called: Nature's Pace

Image of Stampin'UP! stamp set: Nature's PaceOther Project Details:
The image was stamped in Staz-ON ink on Watercolor Paper and colored with blender pens using Perfect Plum and Old Olive Inks. A little bit of White Baker's Twine finishes the image.

Are you inspired to make your own unique creations?

Thanks for stopping by - I hope you are inspired.
Happy Stamping
--Katie

Saturday, September 15, 2012

Polar Iridescent Ice

Card made with Stampin'UP! stamp set called Zoo Review and Iridescent Ice Embossing Powder.
I seem to be smitten by Iridescent Ice.  This embossing powder just gives such a wonderful subtle glittery shine to a project.  Yesterday's post used Iridescent Ice to make the sea shells look a little wet. Today's post uses Iridescent Ice to actually make ice.

The card was made for my sample board for this month's stamping technique: which is Moonlighting.  I've already posted one of the samples that we're doing for this technique - the others will appear here soon.  The Community Stampers are doing 3 examples of moonlighting and then I have a display board to show them  lots of other samples.  This card is on the display board.

The embossed Ice really helps distinguish the 2 halves of the card. Since the card is mostly white I wanted a way to really separate the ground/ice from the sky.  Iridescent Ice Embossing Powder was the perfect way to help draw the line.

Card made with Stampin'UP! stamp set called Zoo Review and Iridescent Ice Embossing Powder.
Iridescent Ice is an embossing powder so it does need to be heat set and it does need something sticky to make it stay on the card while you are doing the heat setting.  I use Versamark Ink as the adhesive for the embossing powder.

There are different ways to apply the Versamark. On yesterday's project the Iridescent Ice was applied to a small area, so I used a blender pen to apply the Versamark ink. The Iridescent Ice on today's project covers a very large area so I just applied the Versamark Ink Pad directly to the whole surface.  It was pretty quick and easy.  And I think it got a very stunning result too, don't you think?

By the way, the Polar Bear image is from a Stamp Set called Zoo Review.  I like this set because the animals look realistic.  Here are 2 other projects done with this set.  The zebra was my trade card for Stampin'UP!'s Leadership Convention last February and the giraffe card was part of a Stamp-a-Stack event this spring. What do you think?  Do you like this set too.  Well, if you're just "lion" around waiting to see more then soon you'll have a reason to "roar".  Yep, there is a lion card all ready prepped and ready to post to check back in a few days to see that.
 Card made with Stampin'UP! stamp set called Zoo Review.   Card made with Stampin'UP! stamp set called Zoo Review


Are you inspired yet?  Ready to get your own Zoo Review Stamp set and Iridescent Ice Embossing Powder?  You can place your Stampin'UP! orders HERE.  And if your order is over $40 you'll get a FREE spool of our gorgeous Satin Stitched Ribbon too.

Happy Stamping
--Katie

Friday, September 14, 2012

Iridescent Shells

Card made with Stampin'UP! stamp set: By the Seashore, and Iridescent Ice Embossing Powder
Yes its fall, but can I post one more card with seashells?  I was really happy with how this card turned out and wanted to share.  I love how the shells have a wet, freshly washed on shore look.  

To get that "iridescent" look to the shells I used Iridescent Ice embossing powder.    After stamping the shells (in Island Indigo) I used a Blender Pen to pick up Versamark Ink and cover the shells.  The Versamark Ink has no color but its a gooey ink so its perfect for holding the embossing powder.  Then I sprinkled with the Iridescent Ice embossing powder and heat set it.

Close up of Stampin'UP!'s Iridescent Ice Embossing Powder
The Iridescent Ice embossing powder is one of my favorite products.  I love the subtle sparkle it gives to my projects.  Because it is an embossing powder you will need to heat set it so it sticks to the projects.  

There are several ways to apply it to the project:
1.  On this project I used a blender pen to "paint" the Versamark ink where I wanted the shine
2. You could also use the Versamark pad to cover the whole project 

Want to see more projects with Iridescent Ice? 
Follow this link to see all the Iridescent Ice projects I've posted.

Other details of this project:
Stampin'UP! Perfectly Penned Stamp Set*the colors are Pool Party and Island Indigo
*the texture was created with the Square Lattice Embossing Folder (and the Big Shot)
*the words are from a set called Perfectly Penned
*the color matched ribbon is Stampin'UP!'s Ruffled Ribbon in Island Indigo

Thanks for stopping by.  You can get your Iridescent Ice Embossing Powder and  shop for Stampin'UP! product 24/7 HERE

Happy Stamping
--Katie

Thursday, September 13, 2012

Punch Art Sun

Punch Art Sandles and Sun Beach Scene
 This punch art card with the sun and sandals is one of the projects we are doing this month at the Community Center Events. The focus this month is MOONLIGHTING - making a sun or moon on a project. The 3 projects this month will each show a different way to make a moon or sun. Punch Art is just one way of making a sun or moon.

You get the beach look by sponging.  I tore the edge of a piece of Crumb Cake paper and lightly dabbed on some Crumb Cake ink with a sponge.  Then I sponged a little more heavily along the torn edge. 


Punch Art: Sun Sponged 


You can see how easy it is to make this sun!  I just punched the yellow piece with Stampin'UP!'s 1-3/4" Scallop Circle Punch (#119854) and the orange piece with the 1-1/4" Circle punch (#119861). The thing that really adds to the look is that I sponged orange on the edges of the yellow scallop. The sponging seems to add rays to the punch art sun - I think its a very effective look!

And here are a few tips for making the sandles - (isn't punch art fun?!)

Punch Art: Using a circle punch to round the end of a strip of paper.
The flowers are punched with the Boho Blossom Punch (#119858).  This punch actually has 3 flower images and I used the 2 smaller ones for the sandles.

Notice the curve on the ends of the sandal?  I cut a 1" strip of the pink paper (Melon Mambo) and inserted just the end into a circle punch.  Oh my gosh - how easy is that! Don't you just love getting extra uses from your punches - I mean besides using them for the intended purpose.

The Green part of the sandal is made with an oval punch.  If you have 2 ovals that "nest" you can punch the smaller one and then punch the larger one around it making a "donut". Then cut that piece in half for the 2 sandals.  If you have just one oval punch then punch it along the edge of the paper and then punch around the hole.  Yeah, pictures are better than words.  I used Stampin'UP!'s Large Oval Punch. Check these photos.
Punch Art: Making sandal straps with an oval punch Punch Art: Making sandal straps with an oval punch

Are You Local (Madison, Wisconsin area)? Why not  join us for one of our many stamping events.  There are lots to choose from: day time events at various Community Centers (Oregon, McFarland and Monona) and many day and evening events at my home. Then you'll get to make fun projects like this.  I hope to see you soon.
And by the way - If you like PUNCH ART
then be sure to check the over 40 different other samples here on my blog.


Happy Stamping
--Katie