Monday, April 30, 2012

Hat = Altered Brad Box

Here's a cute little "Hat Box" OK, its not really for a hat, it just looks like a hat. 

This hat box was made for a 3D swap by one of my downline, Sue Adams. She made it using Designer papers to cover a brad box! The picture in the upper right shows the box with the lid off. We call this type of project an "altered" item.

What do you think of the flower on this box?  Sue punched and distressed multiple layers of flowers and held them together with a brad.

FYI: the punch she used is the Blossom Punch from the Occasions Mini catalog which expires today! I'm sure hoping it re-appears in the new catalog coming out June 1.  I love how she used the same punch for both the leaves and the petals.

What would YOU do with a little box like this?  It's certainly a cute way to re-cycle the brad box. I might fill it with candy and give it to a friend. Actually, I have a niece with a loose tooth - maybe she would use it as a place to leave her tooth for the tooth fairy. I also have an aunt who loves to garden and she always takes off her rings before she puts her hands in dirt. This would be a really cute place to put her jewelry (and then maybe she'd remember where she left it!).  Oh there are so many possibilities!

Here are a few catalog reminders:
Feel free to contact me with any questions: 608-220-3450 or by emailIf you find retiring accessories you want I encourage you to place the order yourself online (would appreciate you naming me as your demonstrator). But given the availability as "only while supplies last" you really don't want to risk going through me and the time involved with phone calls/emails and money transfers. Its better to just order it yourself. Hopefully you are able to get everything you want.

Happy Stamping
--Katie

Friday, April 27, 2012

The catalog transition is always a hectic time. People are making the final decisions about what Stamp Sets and Accessories they want before the end of the old catalog.  The availability of the stamps is handled differently from the availability of the accessories and tools.
  1. The stamps will be available through May 31st
  2. The Accessories, however, will only be available as long as supplies last. Once they're gone, they're gone.  Some items have already sold out.
Have you checked the lists?
Here are some points worth passing along:

re: a mis-print on the Accessory List
The Craft Scissors and the Paper Snips are NOT retiring. They were on the list by mistake.

re: DISCOUNTS
Check the lists yourself, but yes, some accessories (not stamp sets) are discounted 20%, 40% and a few at 70%! But again, remember they are only available while supplies last.   


re: INK PADS and INK RE-FILLS
**Not to worry . . . Stampin'UP! will still be carrying ink pads.
    We are just switching from using a felt pad to a new firm, foam pad which gives even better coverage.
**The Craft pads will only be available in black and white.
**Four of the colors had to be re-formulated to work with the new foam base,
    but the colors are all the same.
**The new re-fills will work with your old pads so there is NO NEED to invest in new ink pads.

re: MARKERS
The markers will also still be available, they are simply being re-packaged. That means they'll be sold as sets instead of individually.  If there is an individual color you want now is the time to get it.

re: COLORS
The only colors retiring are just what we expected, the 2012-2012 IN COLOR group.
Say good-bye to Pear Pizzazz - - Concord Grape - - Blushing Bride - - Poppy Parade - - and Peach Parfait
now is the time to stock up on cardstock and ink refills on these colors

re: PAPER,FABRIC and RIBBONS
As always, this year's Designer Printed papers and fabrics will retire.  IF you have a favorite then get is NOW! Check the retirement list because many of these are now available at deeply discounted prices!
**The 12x12 textured cardstock is retiring. the 12x12 smooth cardstock is being repackaged in selected color only.  Stock up on your favorites now.
**I can't wait to see the new ribbons, but if you have favorites that are retiring, now is the time to get them.

re: PUNCHES
I personally am always sad to see a punch retire - but looking on the bright side it just means that new ones are coming.  Anyway, if you've been thinking about getting one of the punches that is retiring then get it NOW.

I admit I was surprised to see the Lace Ribbon Punch and the 5-Petal Flower punch both on the list.  This card was made with the Lace Ribbon Border Punch.

Be sure to check out the retiring products now. You don't want to miss out on your retiring favorites.

**Remember: all the stamp sets on the list are going away on May 31st.

**But the accessories are available only while supplies last.


Don't wait to order through me personally, Order on-line to avoid disappointment.

Feel free to contact me with any questions
phone:  608-220-3450 or by email

Happy Stamping
--Katie

Friday, April 20, 2012

Card Inspiration Part 1: Modifying Another Card

Where do you get your inspiration? There are lots of places of course.  One way is to simply modify someone else's design.  And one of the benefits of being a demonstrator is that I have hundreds of trade cards to use as samples.

Well here is one idea for you.  I designed this card for the April Stamp-a-Stack.  It was designed because one of my stampers said she liked "white-on-white" (thanks Barb). This was the result.

Details
The top and bottom are 2 separate pieces, each  4.25 x 2.75.  The top was embossed with the Petals-a-Plenty embossing folder and the bottom was embossed with the Square Lattice embossing folder.  These pieces were glued to the card face. 

We made looped the ribbon back and forth on a separate strip of paper. The flower layers were made with the Boho Blossom punch and attached to the ribbon strip with a brad. HINT:  the only way to get a hole through the brad was to use the Crop-a-Dile. A paper piercer or needle did not make an effective hole through the satin ribbon.

The tag was stamped with words from the Tiny Tags stamp set and punched with the Tiny Tags punch.

I did make some other colors of ribbon available and these are some of the other cards the ladies came up with.


Check back tomorrow for more ideas for where to find inspiration

Happy Stamping
--Katie

Monday, April 16, 2012

Stampin'UP! Retirement List

Stampin'UP! has just released the retirement list for the 2011-2012 catalog. The catalog transition always brings a flurry of activity. Now is the time to review the list of retiring stamp sets and see if there are any on your "wishlist".  These sets will be available only until May 31st. The new catalog goes live on June 1st.
WARNING: if you want to use the on-line shopping site to review the list be sure to browse the wood mount list. Only the newer sets are available in clear mount but they ALL come in wood mount.

Stampin'UP! Catalog Transition TimeLine
04/15 - The Retiring Stamp Set List is posted
04/25 - Retiring Accessories List will be Posted
05/31 - Last day to buy any retiring product
06/01 - Items from the New Catalog available
Once the Stampin'UP! stamp sets retire, they're gone. Don't miss your chance to get that favorite set you've been wishing forGet it now before its gone. Contact me with any questions.  Email or by phone: 608-220-3450 or CLICK HERE to shop now.

Happy Stamping
--Katie

Saturday, April 14, 2012

A Mixed Bunch of Easy Cards

Today's post really is a "Mixed Bunch" - 2 cards today! both made with the new Mixed Bunch Stamp Set.  One of the great benefits of using Stampin'UP! product is the fact that so many of the stamps and punches are designed to work together. The Mixed Bunch Stamp set goes with the new Blossom Punch.
 

card made with Stampin'UP!'s Mixed Bunch Stamp Set. by Stamp Lady Katie
This first card is really easy to make. 
  1. stamp the petal image randomly across the card in yellow (Daffodil Delight). 
  2. stamped the center of the flower in green (Wild Wasabi). 
  3. Stamp the sentiment. 
  4. Put the layers together 
  5. and add a little bling in the center of each flower. 
Easy Peasy!  And don't you love Stampin'UP!'s self-stick Rhinestones - they're so easy to use.


card made with Stampin'UP!'s Mixed Bunch Stamp Set and Blossom Punch. by Stamp Lady Katie
The second card is also very easy - AND as a bonus its a great way to use up any pattern paper scraps you have laying around.
  1. Cut 4 squares of pattern paper. I used my 1-1/4" square punch
  2. Round the opposite corners on each square and attach them to the card face.
  3. Stamp the flower image and punch out with the blossom punch
  4. punch a 1" circle from the pattern paper for the center of the flower
  5.  attach the flower with Dimensionals
  6. stamp the sentiment

These cards were part of a bunch I made for a class requested by a friend. She was on vacation last week and asked if I'd do a little class for her and her daughter and some friends. These quick and easy cards were just the right "Mix" for making a quick "Bunch" of cards.

I love putting together events and meeting new people. I'd love to meet your friends and help you create a stamping event just for them. If I do say so, I'm really good both with experienced stampers and I'm good with people who have never stamped before. What kind of event do you want to have?  Call me and lets talk about it.  608-220-3450

Happy Stamping
--Katie

    Thursday, April 12, 2012

    Daffodil Delight: Color Coordinated for Spring

    One of the best things about Stampin'UP! is the fact that all the colors Match!  This is the major factor that first attracted me to this company. Its really important to me that the ink, the paper, the ribbons and the buttons and brads and glitter . . . that it's all color matched. 

    And now Stampin'UP! has come out with a new color in the Seam Binding collection, introducing Daffodil Delight seam binding. I designed this card especially to show off the new seam binding. I wanted something quick and easy and this card was both.

    Details:
    • The textured background was made with the Square Lattice Die run through the Big Shot
    • The image is from a stamp set called Nature Walk
    • The image was colored with markers: Always Artichoke and Daffodil Delight
    • The flowers are "sparkly" because we added some Dazzling Diamonds glitter.
    • The sentiment is from a stamp set called Teeny Tiny Wishes
    Warning: the Seam binding is part of a "Sneak Peak"! What is a Sneak Peak? The term describes product that will be in the next catalog, but has been released early. The conditions of this Sneak Peak is that you can get it during the month of April, but then you'll have to wait for the new catalog before you can order it again.  You can get the supplies to make this card at my Stampin'UP! store.

    Happy Stamping
    --Katie

    Tuesday, April 10, 2012

    Punch Art Pig? - Miss Piggy is Sponged from the Lattice Die Negative

    Punch Art Pig made with Stampin'UP!'s Lattice Die
    Do you like Punch art? Would this qualify? She looked a little plain at first, until I added the bow. Does that mean I can call her Miss Piggy? Maybe not because she doesn't have any hair.

    Parts of her are punch art but she's also sponged. Here's how she evolved. At the Easter Stamp Camp we made a cross using Stampin'UP!'s Lattice Die. You can see the cross card here.

    So after we die cut the shape for the cross I looked at the hole left in the paper and somehow I saw a pig! If you mask off the bottom third and just sponge the top part that's what I saw.  So I made her while my guests were busy stamping their Easter Cards.

    Other Details: I added punched pink pieces for the ear using Stampin'UP!'s Blossom Builder Punch. The Feet are just half circles and the hoofs are cut with the tip of Stampin'UP!'s 5-Petal Flower Punch. The fence was stamped with Stampin'UP!'s Wood Background Stamp. And Stampin'UP!'s Ruffled Ribbon is just perfect for the grass!


    I have no idea who to send this to but I thought she was awfully darn cute!  See what happens when you are with a group of people stamping. You start talking about what you're doing and the ideas just flow.

    Are you Local to the Dane County - Madison - Stoughton area? Be sure to join me for our next event this weekend. Check the Events Calendar and RSVP directly from the calendar, or email your RSVP.

    Hope to see you this either Sunday or Monday
    Happy Stamping
    --Katie

    Monday, April 9, 2012

    Stamping Technique Cards

    Stamping Technique Cards by StampLadyKatie
    Do you love learning new stamping techniques?  Maybe its the main reason you attend a class. People tell me they love learning the techniques, but then they go home and forget what we did? Hopefully this is no longer the case for the people who come to my events. 

    Last fall we started making technique cards at our Stamp-a-Stacks so we could remember what we learned. The focus is still on making a whole stack of cards so you have plenty to send, the technique card is just a little added bonus.  I even supply the book ring to hold them together!

    Our next event is this coming weekend and the technique this month will be Faux Leather. If you are local to the Madison/Stoughton/Dane County area of Wisconsin then please join us.  RSVP for the event on my Stampin'UP! event page or send me an email. There are 2 sessions - take your pick:
    session #1 is Sunday afternoon (Apr 15th) starting at 1:00PM 
    session #2 is Monday evening (Apr 16th) starting at 6PM

    These events are held at my house so if you are new be sure to ask for directions. We do 10 cards, 2 each of 5 different designs. It usually takes 2-1/2 to 3 hours. And, you get to socialize with a great group of people while you stamp.

    Here's your chance to cast aside the cares of the world and forget everything else except the people you're with and the fun of playing with paper. The samples are pre-cut and ready to make, but you are also encouraged to be as creative as you want with your projects.So - whats your skill level?

    **Are you good at following directions?  You'll love this event -  its all laid out for you.

    **Do you love working from a base design and changing it up to make your own creations?
        Great! we encourage and celebrate creativity.

    **Are you a novice who really doesn't stamp much on your own?  This event is for you!
       You'll learn new stuff and you'll come away with projects you're proud to send.

    Contact me today to sign up.  See you this weekend.
    Oh, and bring a camera - I'll have lots of samples on display.
    Happy Stamping
    --Katie

    Sunday, April 8, 2012

    Lattice Die Cross

    This cross was made from the Lattice Die. I'd seen this cross done before but had never stopped to figure out how it was done. Its actually pretty easy. Check the set of pictures below:

    1. Shows the lattice die itself
    2. Shows the negative left when it is cut
    3. When the negative is laid over the card you can see the part that had to be trimmed to make the cross.

    The flowers were punched with the Boho Blossom Punch
    The leaves are from the Bird Builder Punch
    The sentiment is from a set called Just Believe
    The cross is laid on a 1" strip of designer paper.


    Feel free to contact me with any questions.

    We did this card at the Easter Stamp Camp in late March.  I always try to teach something new at every event. Check the events calendar HERE. The next event will be the April Stamp-a-Stack - your choice of 2 sessions: the afternoon of Sunday the 15th or the evening of Monday the 16th.  Bring your camera! and Bring a friend. - whether they are already a stamper or not. I love meeting new people and I love helping you share your enjoyment of this hobby with your non-stamping friends. Hope to see you there.

    Happy Stamping
    --Katie

    Saturday, April 7, 2012

    Blossom Favors for Your Easter Table

    Spring Table Favor made with Stampin'UP!'s Blossom Punch and Mixed Bunch Stamp Set
    How do you decorate your Easter Table?  We are getting together with family tomorrow to celebrate Easter and I'm going to put one of these little table favors by each person's place. Its just a little thing but it really dresses up the table and its an easy treat for everyone. 


    And of course this is not unique to Easter. This would dress-up any dinner table and really make your guests feel specially welcome.


    These favors are really easy to make! You can probably figure out what to do to make these just by looking at the picture. 
    1. Punch the flower shape out of green and trim for the leaves. 
    2. Punch the yellow flower shape as a base. 
    3. Stamp and punch the flower image.
    4. Adhere the papers together.
    5. Add a Rollo with a Glue Dot or Sticky Strip (extra strength adhesive to hold the candy)
    6. Curl the petals with a bone folder.


     The supplies I used:

    *Mixed Bunch Stamp Set
    *the new Blossom Punch

    *a Rollo
    *a glue dot or sticky strip
    *bone folder
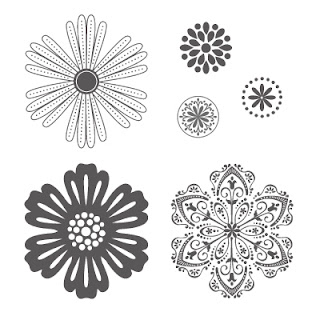
    Stampin'UP!'s Mixed Bunch Stamp Set Stampin'UP!'s Blossom Punch
    I really like Stampin'UP!'s new Blossom punch and matching images from the new Mixed Bunch Stamp set. The edges of this punch are fancy in a simple sort of way. OK, oxymoron, but I really do like the shapes.  If you don't have these supplies you could probably make these table favors with any flower punch and use Designer Paper or even a background stamp. Of course, if you like these supplies you can get them at my Stampin'UP! website.


    Happy Stamping
    --Katie

    Friday, April 6, 2012

    Embossing Folders Add Texture

    Isn't is amazing the difference in a card when you add a little texture. The cones on this card would have looked just fine if they'd been made of plain (smooth) brown paper. But it totally makes the card when they're embossed to look like a waffle cone. 

    To make the cones the texture was added before the shape was punched. The cone texture was added with the Square Lattice embossing folder and the shape was punched with the Petite Pennants Builder Punch.

    To make the Ice Cream punch out half of the Scallop Oval Punch. I love being able to use my punches in ways they weren't intended. I feel like I'm really getting my money's worth when I can find additional uses for them.

    Do these colors remind you of Blue Moon, cherry and mint ice cream? The colors used were Bashful Blue, Blushing Bride and Pear Pizzazz. And they even have a little cherry on top - punched from Red Glimmer Paper.

    Now lets add some more texture. The background was made with the Elegant Lines embossing folder. And compare card #2 below when we use the same embossing folder to make some lines on the ice cream itself! Wow. Texture totally makes the card.

    Check out all the great Stampin'UP! embossing folders at my online store.

    Happy Stamping
    --Katie


    Tuesday, April 3, 2012

    Summer Smooches Geometric

    Stampin'UP!'s new Summer Smooches Designer paperThe new Designer paper in the Summer Smooches bundle is full of bright colors and geometric shapes.

    I can really see myself using this paper pack for lots of things. I tend to like the smaller print designs because I think they are more versatile on card projects. How about you?  Are you a fan of the larger print patterns or smaller prints like this package?


    Notice the bold design  in this paper - full of circles. Often on cards you will see a ribbon or paper strip used as a grounding line at the base of the element. This card uses a line of circles to complement the images in the Designer paper.


    *The "rays" of the flower are made from the new
       matching fabric and was die cut with
       the Daisy Die (#114520).

    *The leaves are also die cut using the
       Little Leaves Sizzlet Die (#114511)


    The paper used on this card matches the imagery from the new Bright Blossoms stamp set shown below.


    . . . . ....

    These products will be in the new catalog coming out June 1st. They are available to you now for a limited time before the catalog release. You can see the flyer describing all the product in this release HERE in this post.  Contact me for more details.  Or better yet, lets set up a time for me to show you and your friends this great new product bundle. I'd be happy to come to your house for a quick "show and tell".

    Happy Stamping
    --Katie

    Monday, April 2, 2012

    New Purse Die

     I just love a new purse! How about you?  And even better when its Stampin'UP!'s new purse die. This die will cut the shape and score the lines so you can make cute purses like these. 

    I got both of these samples at a recent demonstrator meeting. The watermelon purse was designed by Rachel Durtschi, as a Make & Take and I got the blue purse as a Trade made by  Deb Geier.


    The purse handle is part of the die. For the blue purse, Deb cut her handle from Designer Paper. For the watermelon purse we made a handle from ribbon.

     
    The blue purse has something else special - the printed design is actually FABRIC! Its from the new Summer Smooches bundle which will be in the new catalog coming out in June. It is available for a limited time during April as part of a Summer Smooches  Bundle special. You may actually recognize it from an earlier post of mine. I attended Leadership Convention in January and they gave us all a real purse made with this fabric.


    This die is SUPER easy to use! contact me to schedule a 1-hour workshop so I can show you and your friends how quick and easy it is to make these cute purses. email: StampLadyKatie@aol.com


    Happy Stamping
    --Katie
    Sunday, April 1, 2012

    Summer Smooches for You

    Stampin'UP! has just released a new catalog Promotional Bundle called Summer Smooches. Its not often that you (the customer) get to see, much less actually buy new catalog products before the catalog goes live. This product bundle includes a new stamp set, fabric and designer paper, seam binding, designer brads and a digital download.

    These items will be in the new catalog which won't go live until June 1st, but they are available for a limited time for customer purchase right now.

    Contact me today to schedule a "mini-workshop" to show off this new product


    When I first saw this flyer I had so many ideas for ways to use it. I really like the papers in this collection - I just love small prints and these are so cute. And the matching printed brads are wonderful! I've put together a whole "mini" workshop just around this bundle. Call me today to schedule a little 1-hour workshop for you and your friends.

    Happy Stamping
    --Katie