Saturday, October 31, 2015

Eyeball Treats from Mints or Rolos

Here's a Happy Halloween Treat thats quick to make.

Make some Halloween Eyeballs 
with a few circle punches - and some black, white and green paper 


This is an easy Kids Project. Something to keep them busy until they go trick or treating. 
Or something for the kids to GIVE when they knock on people's door. 

The concept works with any circular candy: 
 I've made them with Peppermint Patties and Rolos.
. . . and they're equally tasty either way. 

Thanks for Stopping by: Take a minute and browse previous posts. If you see anything you like I'm happy to help you get the product or just to consult and explain further how the project was made . . . its all about having fun with our hobby.


* * * View Available Product* * *
Up to 80% Savings  Clearance Rack Items
the Weekly Deals
new product each Tuesday
2015-2016
Annual Catalog
2015 Holiday Catalog

* * * Buy Here * * *
I'll be happy to help you place your order 
If you're ordering on-line then use this Hostess Code 
 to be registered for my Customer Rewards Program
Q4GNPRSC  (good thru - October 31st)

Friday, October 30, 2015

Pumpkin Telescope Card

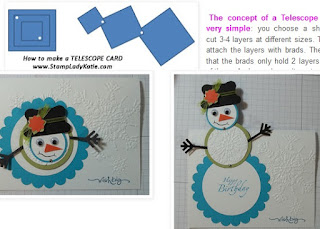
Do you know what a telescope card is?  Its one of those little engineering feats that gets you an incredulous "COOL!" when you give the card.  It requires 3 or 4 successively smaller sized cut out matching shapes.  I've used circles for this Pumpkin Telescope Card.


It you're thinking he doesn't look very impressive, 
then check out what happens when you pull up on the stem.

Cool! Right?

A few Details:

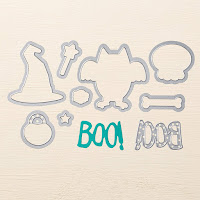
Stampin'UP!'s Halloween Boo to You Framelit set   Use the Stampin'UP! Tree Punch to make the pumpkin eyes

Use a Scallop Oval Punch to make the Pumpkin Mouth Use a Scallop Oval Punch to make the Pumpkin Mouth

If you're intrigued by the concept of a Telescope card 
then check out this post about a snowman Telescope Card

Link to post on How to Make a Telescope Card

Thanks for Stopping by: Take a minute and browse previous posts. If you see anything you like I'm happy to help you get the product or just to consult and explain further how the project was made . . . its all about having fun with our hobby.


* * * View Available Product* * *
Up to 80% Savings  Clearance Rack Items
the Weekly Deals
new product each Tuesday
2015-2016
Annual Catalog
2015 Holiday Catalog

* * * Buy Here * * *
I'll be happy to help you place your order 
If you're ordering on-line then use this Hostess Code 
 to be registered for my Customer Rewards Program
Q4GNPRSC  (good thru - October 31st)

Wednesday, October 28, 2015

Recycled Name Tags Becomes an Igloo Card

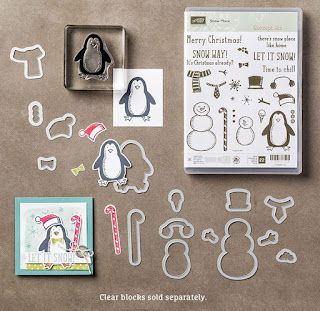
Today I'm showing off how I re-purposed my name tag. At our last Madison Area Stamping Stars meeting we all got a piece of glimmer paper and the parts to make a snowman or penguin and a half yard of ribbon.


Then we were challenged to go home and make something from the parts.  
So here's mine, what do you think?


The images are from a set called Snow Place. The parts were all prepped by one person and before you start worrying about how much time she spent cutting (there were 30 of us at the meeting) there is a matching die set so she wasn't "fussy cutting" by hand.  Still and all it was a formidable task, or a labor of love - thanks Susan Wanta.


To make the Igloo I die cut a circle and embossed it with the Brick Wall embossing folder.  I left the "debossed" side up because it thought that looked more realistic.  Check out this post with photos of the embossed and debossed sides using the Brick Wall folder. . . . And of course what's snow without the sparkle - so a little Dazzling Details Glitter Glue to finish it off.


Thanks for Stopping by: Take a minute and browse previous posts. If you see anything you like I'm happy to help you get the product or just to consult and explain further how the project was made . . . its all about having fun with our hobby.


* * * View Available Product* * *
Up to 80% Savings  Clearance Rack Items
the Weekly Deals
new product each Tuesday
2015-2016
Annual Catalog
2015 Holiday Catalog

* * * Buy Here * * *
I'll be happy to help you place your order 
If you're ordering on-line then use this Hostess Code 
 to be registered for my Customer Rewards Program
Q4GNPRSC  (good thru - October 31st)

Tuesday, October 27, 2015

Wonderland Trees on a Frosty Night

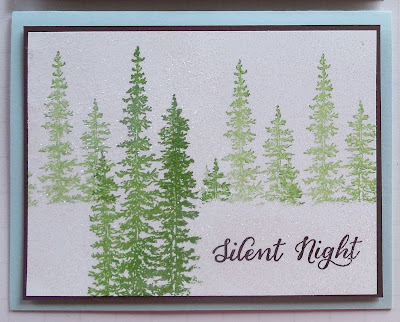
This sparkly tree card by Rachel Durtschi is drop dead gorgeous!  

Christmas Card made with Stampin'UP!'s Wonderland Stamp Set

 
Rachel used the Wonderland Stamp set. And there is a trick to making the row of trees in the background.

The trees stamp used for the background is tall, they're the same trees as in the foreground on this card.  The trick is to use post-a-notes to block off the bottom half when you stamp the tree row.

I got to make this card at an event I attended with Rachel and then I used it for one of my Christmas Card Classes. People LOVED it!

Can you see in the photo how sparkly the whole card is?  You get that look with Iridescent Ice embossing powder.  After you finish stamping the card, you cover the whole front with Versamark Ink and then cover it with Iridescent Ice embossing powder and heat set it.  Super sparkly gorgeous. 

Would you like to make cards like these?
Our next Christmas Card event is November 15th. 

Thanks for Stopping by: Take a minute and browse previous posts. If you see anything you like I'm happy to help you get the product or just to consult and explain further how the project was made . . . its all about having fun with our hobby.


* * * View Available Product* * *
Up to 80% Savings  Clearance Rack Items
the Weekly Deals
new product each Tuesday
2015-2016
Annual Catalog
2015 Holiday Catalog

* * * Buy Here * * *
I'll be happy to help you place your order 
If you're ordering on-line then use this Hostess Code 
 to be registered for my Customer Rewards Program
Q4GNPRSC  (good thru - October 31st)

Monday, October 26, 2015

Rock and Roll Technique

I posted this card a few days ago -
its one of the cards we did at our Community Center Events this month.

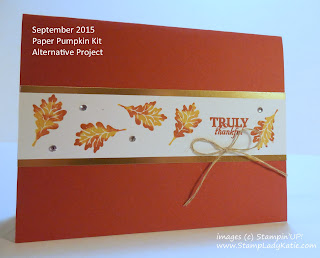
Fall card made with Stampin'UP!'s Sept 2015 Paper Pumpkin stamp set and using the Rock-n-Roll Technique

Today I wanted to share this video I found on the Stampin'UP! YouTube Channel
It shows how to do the Rock-n-Roll Technique.
Watch that wrist action . . . the whole video is short, only 0.47 min.  Enjoy!


Cool technique right? If you're local to the Madison/Dane County area please join us at one of our Community Center Events.  They're held at the Senior centers, but you don't have to be a Senior to attend (no one will ask your age). You just have to be free during the day. I do monthly events at 4 different centers: Oregon, Fitchburg, Verona and Monona.  The projects are the same at each location so it doesn't matter where you choose. 

And if you're looking for a daytime group to join you can't go wrong with these people.  My stampers are wonderful, friendly helpful people and you'll love getting to know them.  

Bring your own adhesive and bring a camera - I always have tons of displays.


Thanks for Stopping by: Scroll down and browse past posts. If you see anything you like I'm happy to help you get the product or just to consult and explain further how the project was made . . . its all about having fun with our hobby.

* * * View Available Product* * *
Up to 80% Savings  Clearance Rack Items
the Weekly Deals
new product each Tuesday
2015-2016
Annual Catalog
2015 Holiday Catalog

* * * Buy Here * * *
I'll be happy to help you place your order 
If you're ordering on-line then use this Hostess Code 
 to be registered for my Customer Rewards Program
Q4GNPRSC  (good thru - October 31st)