Before I get to the "Good News" item let me respond to Georgia's Question. Georgia wrote to ask me what exactly MDS was and "how does this digital crafting thing work?" Thanks for the question.
MDS or as its more properly known, My Digital Studio, is software. That means it is a program written to do something. Any Digital stamping or Scrapping program should be able to do these things.
- it should be able to resize images
- it should let you position the image anywhere on the page
- it should let you rotate and flip the image
- it should let you change the image (round the corners, crop off an edge, change color to black and white and more)
- it should allow you to add text and to alter the text in the same way as you alter text in a word program
- it should allow you to import "clip art"
- it should allow you to control the "layers", whether a picture is on top another
- it should be able to alter the color and pattern of the background
My Digital Studio does all this and more!
- The colors are Stampin'UP! colors
- Backgrounds can also include our exclusive Designer Paper
- You can choose between scrapbook pages of various sizes, banners, cards, calendars and even create an interactive CD
- and the the "clip art" is our stamps and punches, ribbons, designer papers, brads, buttons and more.
The program is just the capability to manipulate the images, stamps and designer papers. The "clip art", that is, the digital stamp sets, papers and bling, are separate purchases. And the Good News is that right now its all on sale!
Stampin' Up! has decided to extend the 31% Off Digital sale until September 14!
Here is the news item from our demonstrator website today:
"We know you are wrapping up
summer stuff, getting everybody back to school, and things are busy. Now
you can have a little more breathing room to finish your projects to
send them off to print services. And don't forget about the 31 digital
content items on sale too. Snatch up your favorites before September
14. "
"Yes, we realize that this change doesn't go along with our little "31
theme," but . . . who cares? When we're talking SALE, 45 days is better
than 31! Don't you think?"
What's on sale? Selected downloads and printing services.
Print Services:
ALL cards, photobooks, individual pages, and tags. That's right: print any photobook, board book, swatchbook, individual pages, greeting card, postcard, trifold card, or tag-all for 31% off.
You have to see this - check out the variety of print options HERE.
Digital Downloads: Some of our best digital content. 30 downloads and 1 content disc.
Click here to get a visual on these products.
| Item |
Digital Content |
Retail Price |
31% Off Price |
| 127217 |
Floral District Collection Disc |
$ 23.95 |
$ 16.53 |
| 118115 |
Night and Day Designer Series Paper |
$ 4.95 |
$ 3.42 |
| 129929 |
Candid Frames |
$ 2.95 |
$ 2.04 |
| 129921 |
Check This Out Page Templates |
$ 4.95 |
$ 3.42 |
| 129609 |
Blossom Builders Embellishments |
$ 5.95 |
$ 4.11 |
| 128999 |
It's All Me Kit |
$ 9.95 |
$ 6.87 |
| 127441 |
Whimsical Note Journal Template |
$ 1.95 |
$ 1.35 |
| 128342 |
Pinwheel Daily Calendar Template |
$ 9.95 |
$ 6.87 |
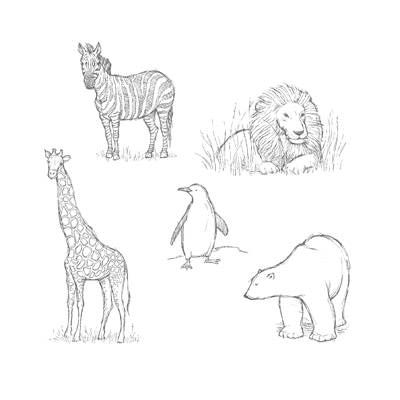
| 127599 |
Party Animal Kit |
$ 9.95 |
$ 6.87 |
| 127600 |
Autumn Traditions Kit |
$ 9.95 |
$ 6.87 |
| 127620 |
Grateful Heart Thanksgiving Ensemble |
$ 14.95 |
$ 10.32 |
| 126027 |
Playful Polka Dots Kit |
$ 9.95 |
$ 6.87 |
| 130066 |
World Traveler Photobook Template |
$ 17.95 |
$ 12.39 |
| 131221 |
Storybook Specialty Designer Series Paper |
$ 4.95 |
$ 3.42 |
| 130850 |
Joyful Times Kit |
$ 9.95 |
$ 6.87 |
| 124463 |
One Great Year Digital Kit |
$ 9.95 |
$ 6.87 |
| 127175 |
Limited Edition Embellishments |
$ 2.95 |
$ 2.04 |
| 129607 |
Walk in the Park II Kit |
$ 9.95 |
$ 6.87 |
| 129934 |
#HASHTHIS Stamp Brush Set |
$ 7.95 |
$ 5.49 |
| 129923 |
Book of Birthdays Swatchbook Template |
$ 12.95 |
$ 8.94 |
| 121071 |
Travel Journal Kit |
$ 9.95 |
$ 6.87 |
| 129924 |
Get it Done Kit |
$ 5.95 |
$ 4.11 |
| 129005 |
Sweetly Nested Framable |
$ 4.95 |
$ 3.42 |
| 127758 |
Delight in the Day Photobook Template |
$ 19.95 |
$ 13.77 |
| 130862 |
Blast Off Ensemble |
$ 19.95 |
$ 13.77 |
| 129890 |
Little Milestone Birthdays Greeting Card |
$ 7.95 |
$ 5.49 |
| 128892 |
Designer Gift Cards |
$ 4.95 |
$ 3.42 |
| 127580 |
And a Happy New Year Photocard Template |
$ 1.95 |
$ 1.35 |
| 127435 |
Thanks Tons Greeting Card Template Set |
$ 2.95 |
$ 2.04 |
| 127587 |
Sending Glad Tidings Designer Tags Kit |
$ 7.95 |
$ 5.49 |
| 127762 |
Gratitude Framable Designer Template |
$ 1.95 |
$ 1.35 |

And there's even more good news, you can TRY THE PROGRAM FOR FREE. Download the software and play with it for a full month before you decide whether or not to invest. But to take advantage of the 31% sale prices you must purchase the print product and digital content items before Sept 14th.
We know that software takes some time to learn. So extending the sale deadline makes sense.
Stampin'UP! really is committed to your success.
Feel free to contact me with any questions
Happy (digital) stamping
--
Katie


 Yeah, I know its only August, but is the last day of August and tomorrow it will be officially fall, so its OK, right?


.jpg)


-byStampLadyKatie.jpg)
-byStampLadyKatie.jpg)